
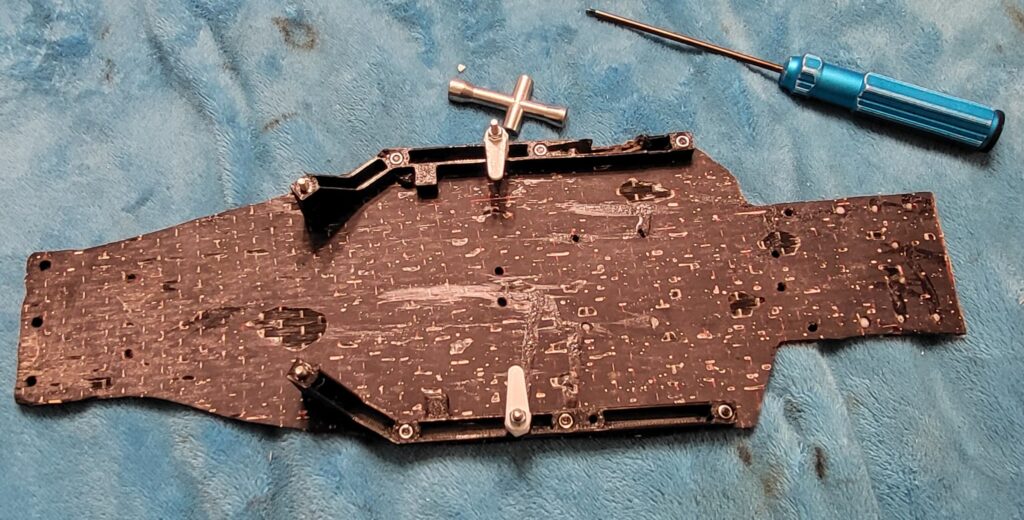
Following my last article on the Traxxas Bandit that I’ve had for nearly 30 years I’ve decided to build upon the performance of the rear motor design with something a little more modern. Initially I had tried to just flip the transmission 180 degrees but the lessons I’ve learned from Project WT(FWD) taught me that this would have the wrong amount of anti-squat thanks to the design of the stock Traxxas transmission case. Doing so reduces traction tremendously and would ruin the driving feel of the car. Luckily I stumbled across a mid-motor conversion while looking up some other STL files online and proceeded to start printing them out on my Anycubic Kobra 2 Pro using some PETG fiament at 100% infill. This ensured that the parts would be sturdy and up to the task of either being used at templates (in the case of the motor plates, chassis plate and shock towers) or being used as the final part (like the chassis side rails, battery tray, transmission cases, chassis waterfall and battery locks). The NIcksCNC files that I used allow you to print parts for a 3-gear standup transmission (for low grip surfaces), a 3-gear laydown transmission (for mid-level grip surfaces both indoor and out) or a 5-gear laydown transmission that can be used on carpet or astroturf. The chassis plate is pre-drilled for all three options and each utilizes their own shock tower and motor plate. I chose to cut my chassis out of a plate of forged carbon fiber that I made at home and also used this 3.5mm thick piece to lay out the shock towers and motor plates. Cutting CF is a pain, no way around it. I’ve tried my 9″ band saw with limited success, a bearing guided router bit in a Dremel, a cutoff wheel in a Dremel and even just a sanding drum in the Dremel. None worked especially well but without a laser, a tabletop CNC router or a 5-axis CVC i don’t see this process being any easier. Here is where the chassis sits as of now:
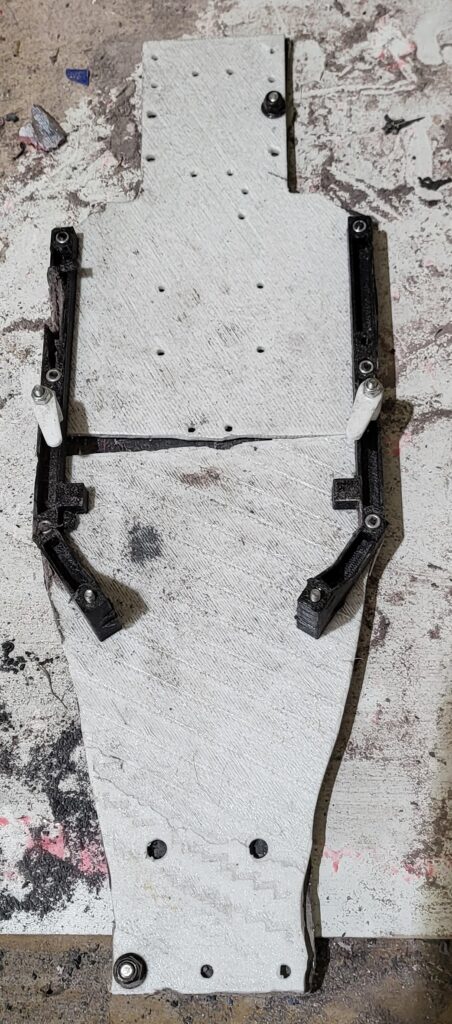
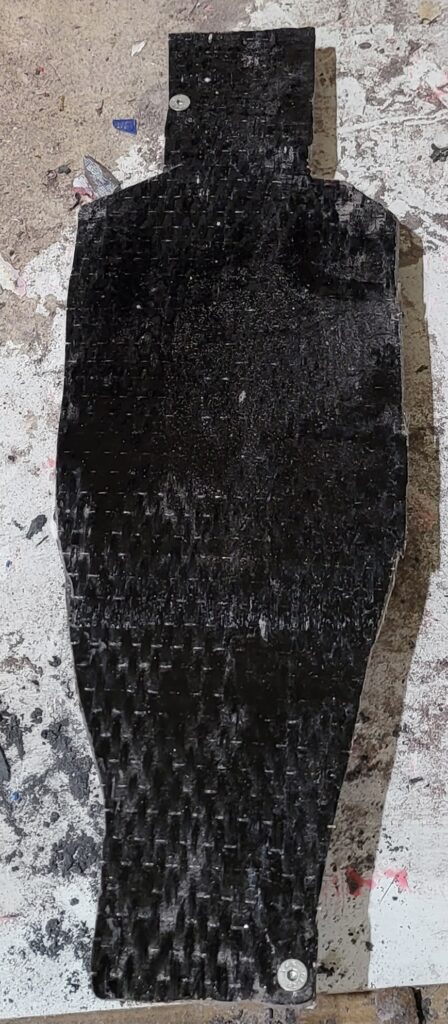
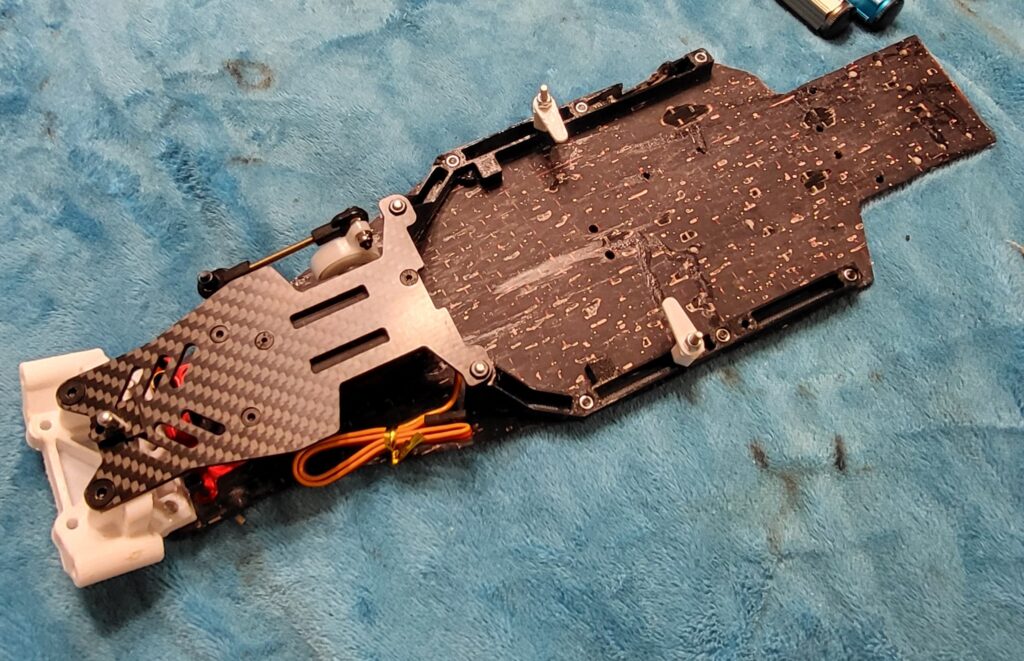
Bolting the templates to the carbon plate makes trimming things to the final shape much easier and I highly recommend using this method. The chassis in white was split in my slicing software a little cockeyed, meaning it looks like it is crroked when placed on the carbon plate but I have cross measured its position and it is centered. Cutting the motor plates and shock towers is the next big hurdle, once those are cut the rest of the project should go relatively quickly. This car will be built similarly to the rear motor car with wide suspension, a carbon top deck, reinforced shock tower for the front, aluminum caster blocks, steering blocks and rear hubs as well as aluminum bellcranks. As for the finishing details such as body, wheels and tires, those decisions are still up in the air. Stay tuned to see what’s next!
Today I got a few of the subassemblies finished and ready to bolt onto the car once the chassis is ready. Below are the completed laydown transmission with waterfall and separate toe blocks, the carbon upper chassis with steering rack, servo and new high roll center front bulkhead, front suspension assembly with RPM rear rustler arms, carbon toe and camber links, aluminum caster blocks and steering knuckles, rear suspension assemblies with RPM rear rustler arms and carbon camber links, the standup transmission case and waterfall, and finally the body velcro tabs, battery spacers and battery shims.

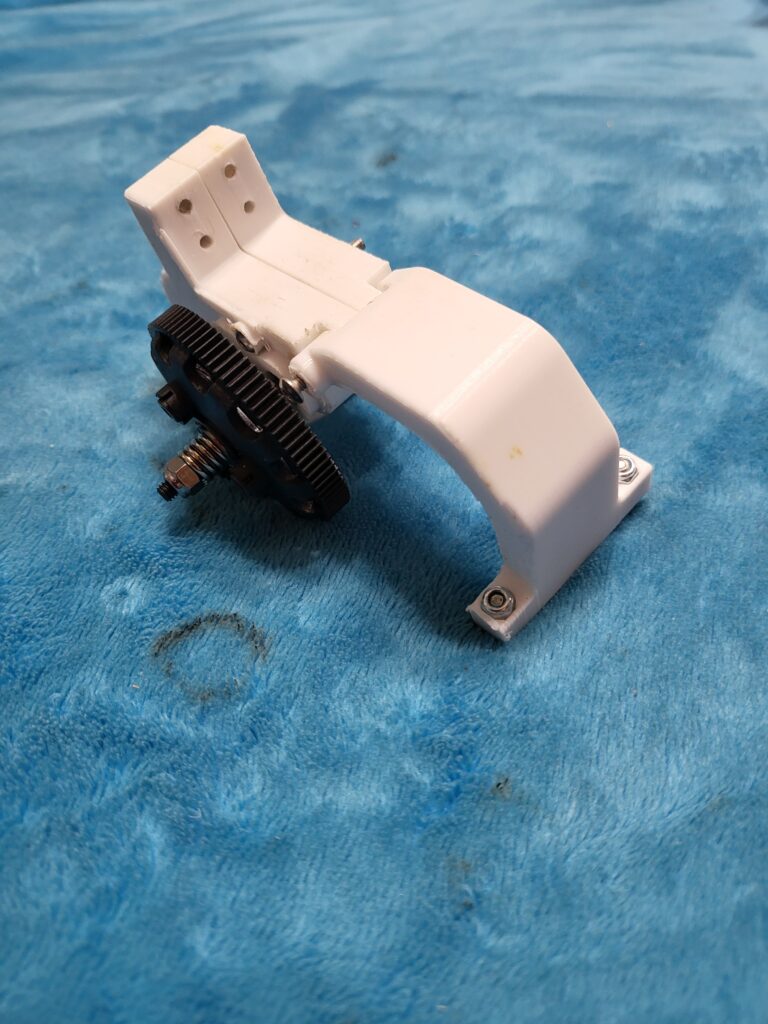
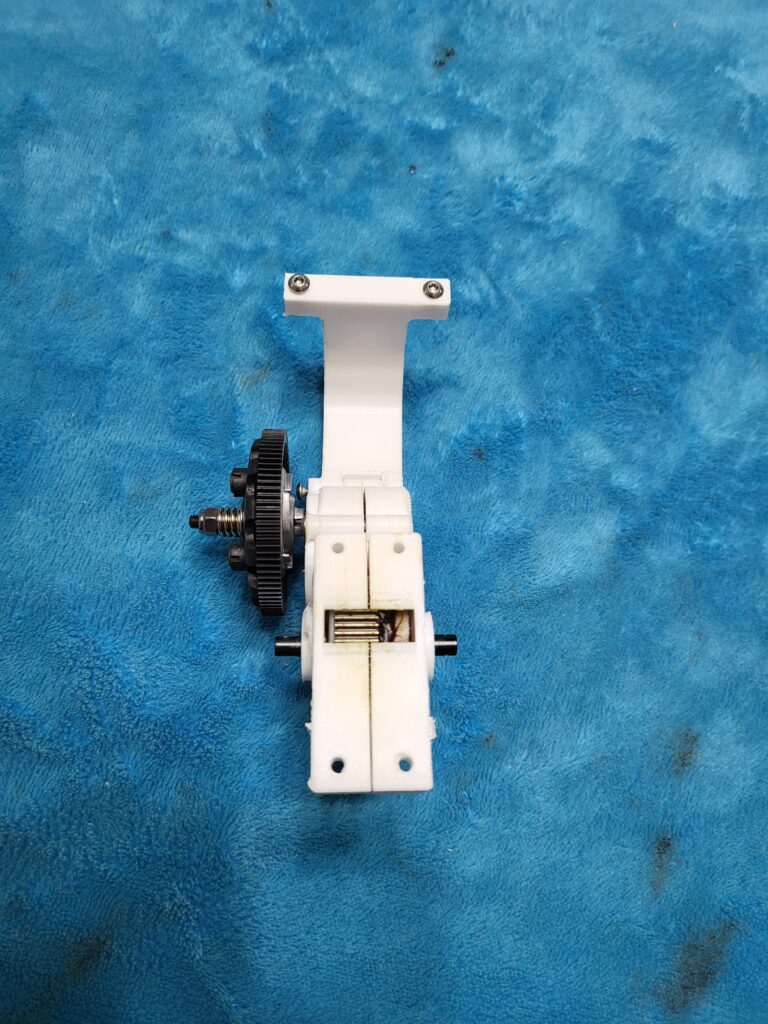
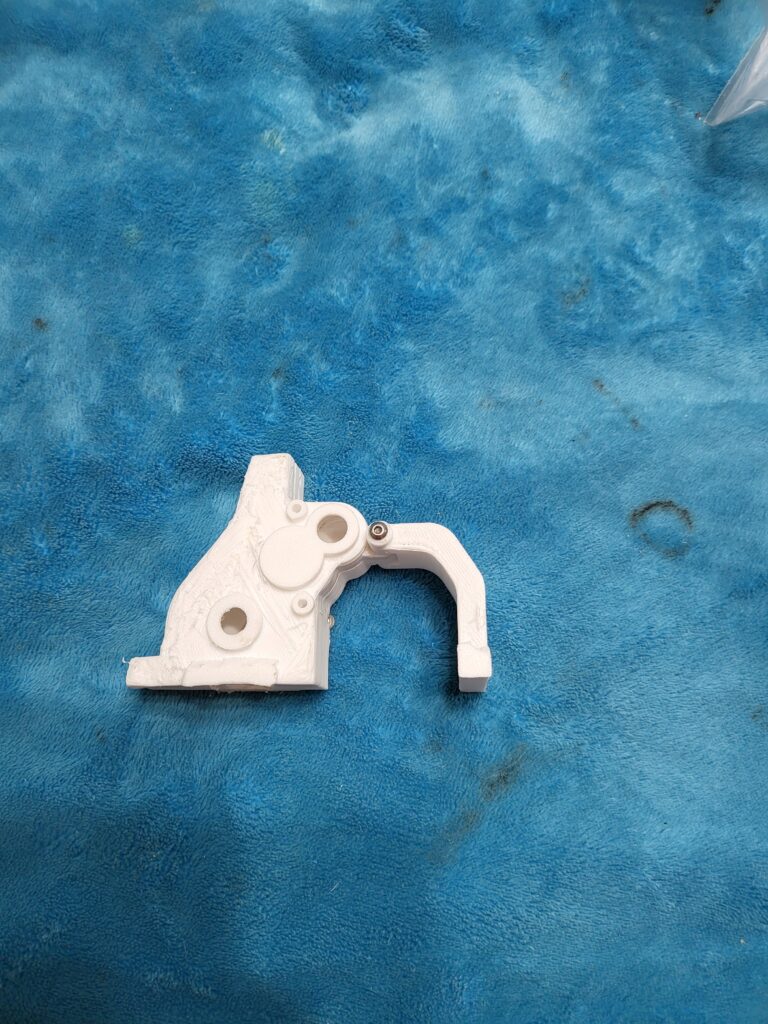
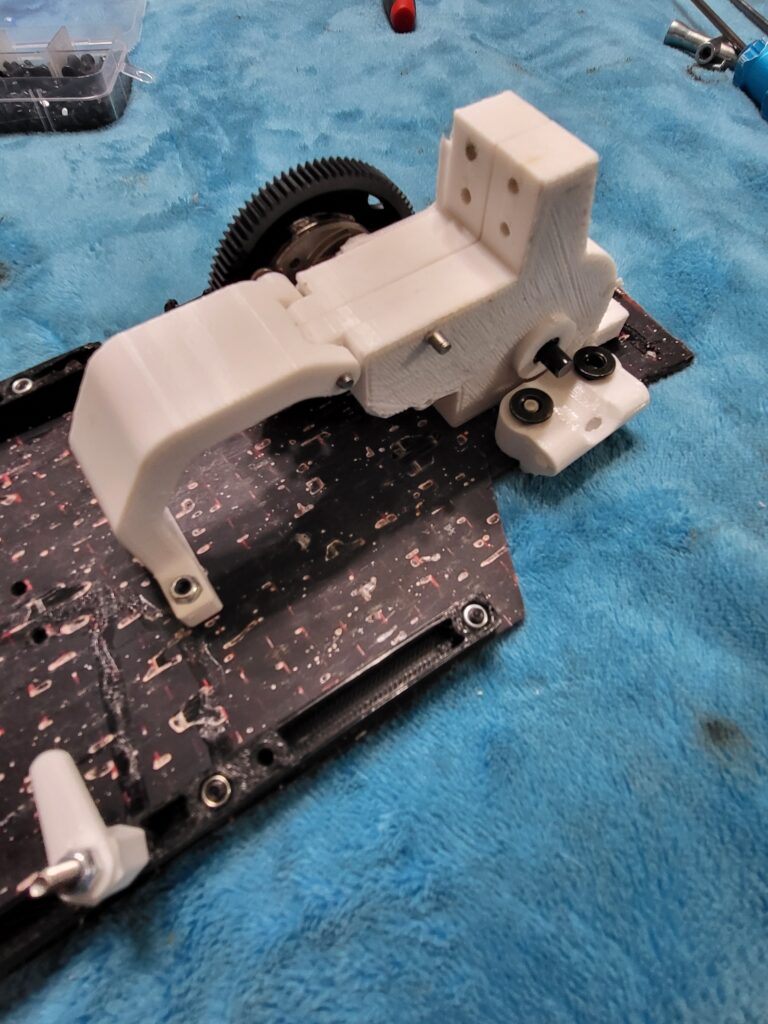
These three photos show the completed laydown transmission assembly, Inside the 3d printed PETG case is a Traxxas 272R one-piece top shaft with Revo slipper assembly, a steel idler gear, lightweight aluminum idler gear shaft and a steel diff. The waterfall can be unbolted from the chassis to make motor removal and installation easier. The only piece missing from these photos is the rear camber link mount which will need to be re-printed as the first prototype wasn’t quite strong enough and easily stripped its mounting nut location.
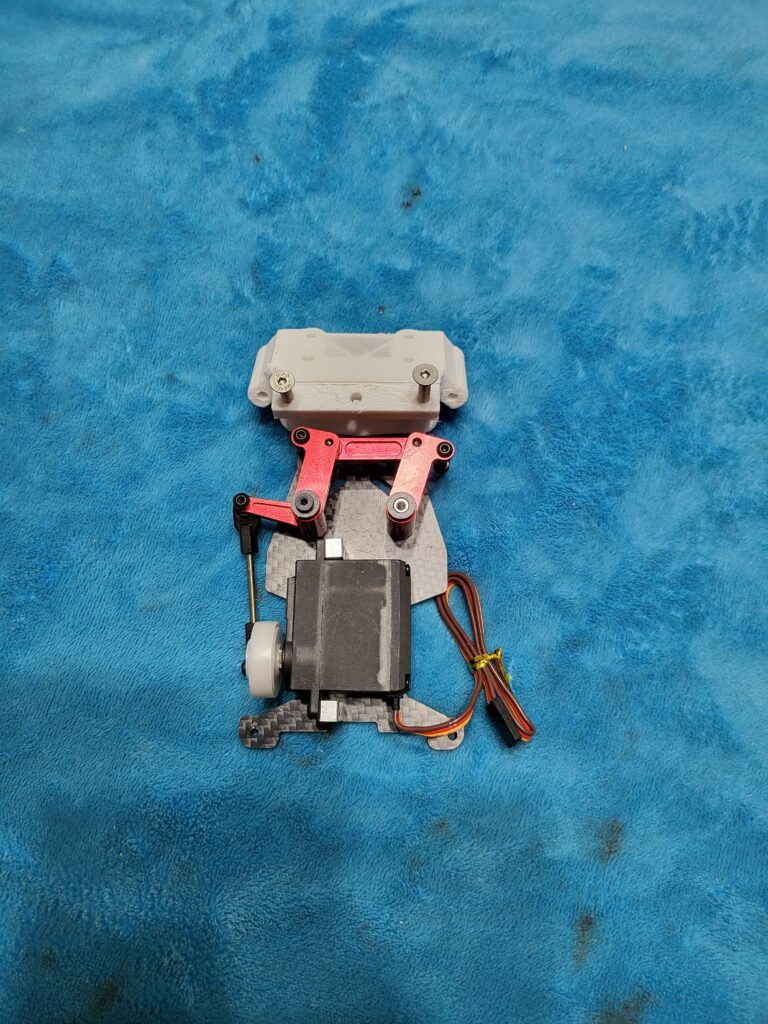
Pictured above is the carbon fiber top deck with its aluminum steering rack and servo already attached. I will be replacing the stock spring style servo saver with an aluminum horn; the plastic piece was just being used for mock up while the aluminum horn was being shipped. Attached to the top deck is a new high roll center front bulkhead that raises the inner hinge pin mounts by several millimeters to allow the car to pitch and find additional front end grip. I also have an RPM stock style front bulkhead to try if this piece does not work out, giving me the added option of adding weight to the nose if need be.


The front suspension is fairly basic and mirrors the setup of my rear motor Bandit. Starting with RPM rear Rustler suspension arms I’ve also added carbon fiber camber and toe links, aluminum caster and steering blocks as well as Slash 2wd front axles that allow the use of standard 12mm hex front wheels.
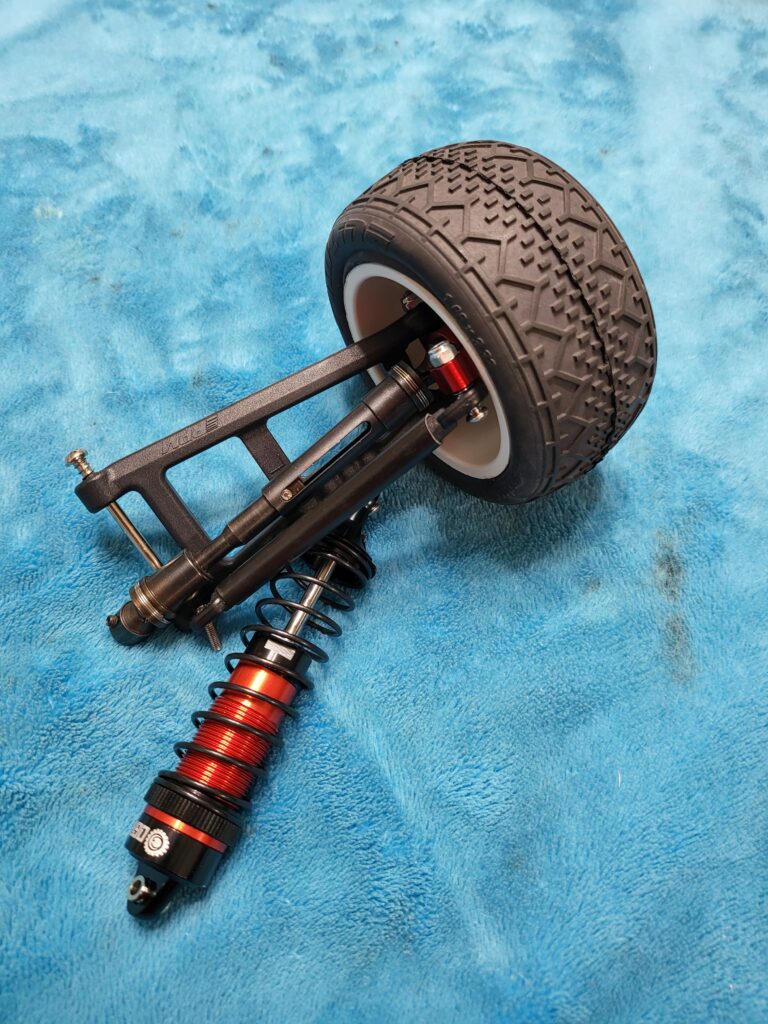
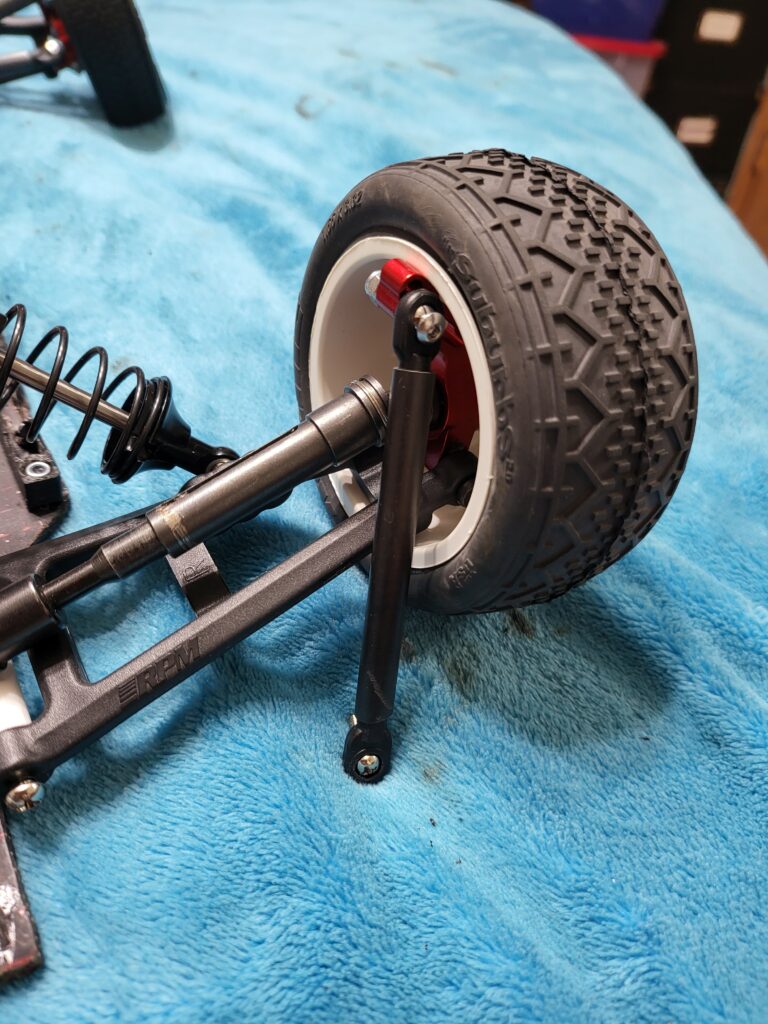
Out back is much of the same with another set of RPM Rustler rear arms, carbon links and aluminum rear hubs. A set of GPM universal shafts feed power to the wheels and a set of OGRC big bore dampers keep the tires planted and cushion the ride. I’ve found these shocks to be surprisingly good for the price; they don’t leak, are smooth and easy to build and can use standard Team Associated springs, making tuning them a simple task.
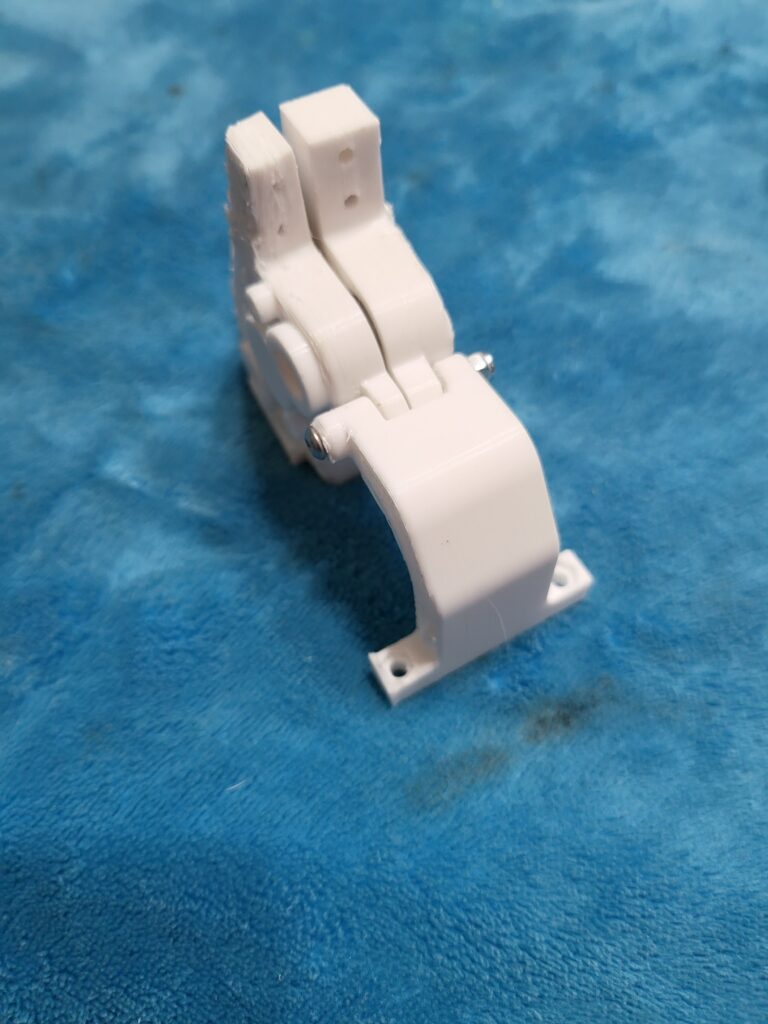
Shown above are the two halves of the standup transmission case and its waterfall. This housing is currently empty as it doesn’t take long to swap the internals from the laydown transmission when swapping out the cases. As mentioned before the chassis is drilled to accepts any one of the three transmission options so hot swapping them at the track is a simple affair. This layout most closely mimics the stock Traxxas transmission arrangement.

Finally we have the battery tabs (upper right), the battery lock risers for taller packs (bottom row) and the body velcro mounts (upper left). These pieces are universal and work with any of the three transmission layouts.
UPDATE: March 9, 2025
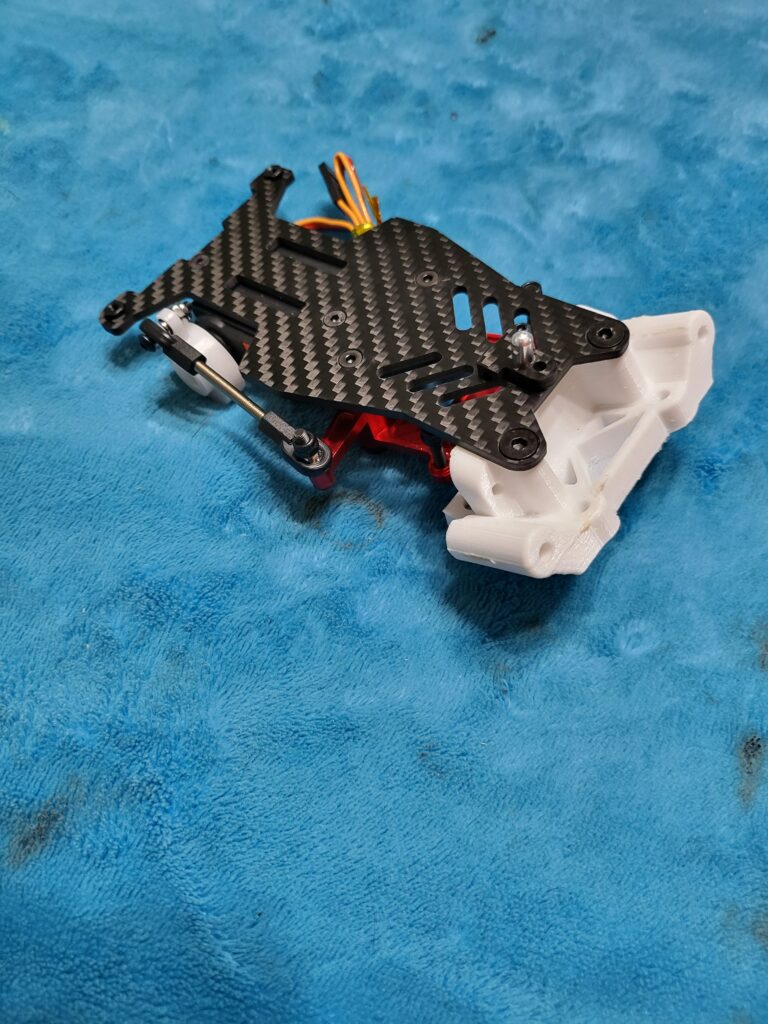
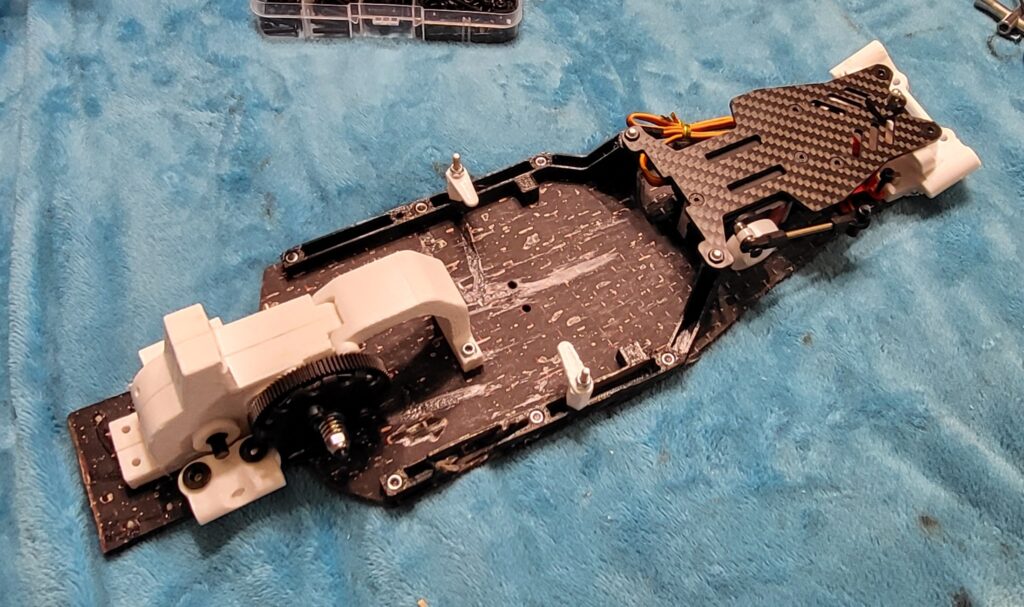
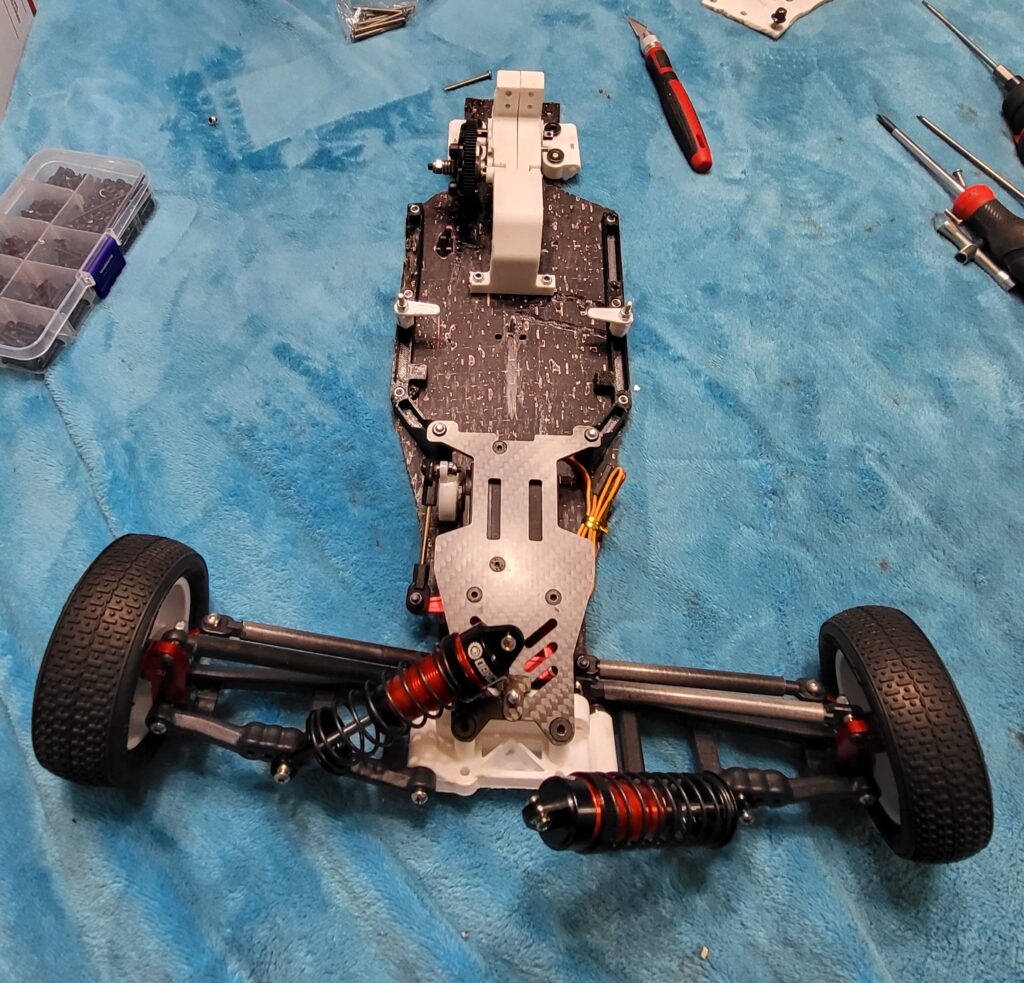
I managed to get some work done on the chassis last night and mounted the upper deck, steering rack, front bulkhead, front suspension assemblies, servo, laydown transmission and rear arm mounts. The next step is to fix the printer and make new rear camber link mounts as well as new side rails (the ones on the car got damaged during the chassis layout process). I have the shock towers and motor plates ready to cut, all that is left is to get the nerve to do so! On to the pics:
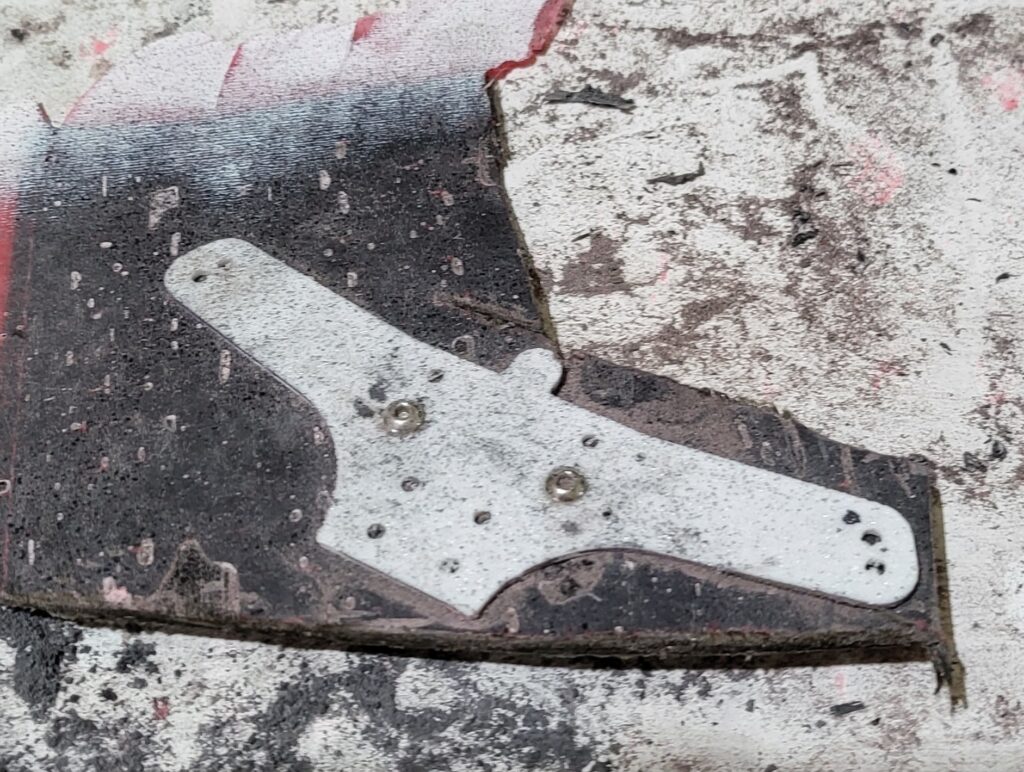
This image shows the side rails and battery tabs installed. The side rails need to be re-printed as I accidentally cut into them while cutting the chassis plate. That is the risk of using the printed chassis as a template, sometimes slip-ups happen!
The Nick’s CNC files include a nut holder that sits down into the countersink for the rear M3 mounting screws for the upper deck but I chose to use standard M3 nuts and loctite instead as the screws I had were a few millimeters too short to use a nylon locking nut or the Nick’s CNC piece.
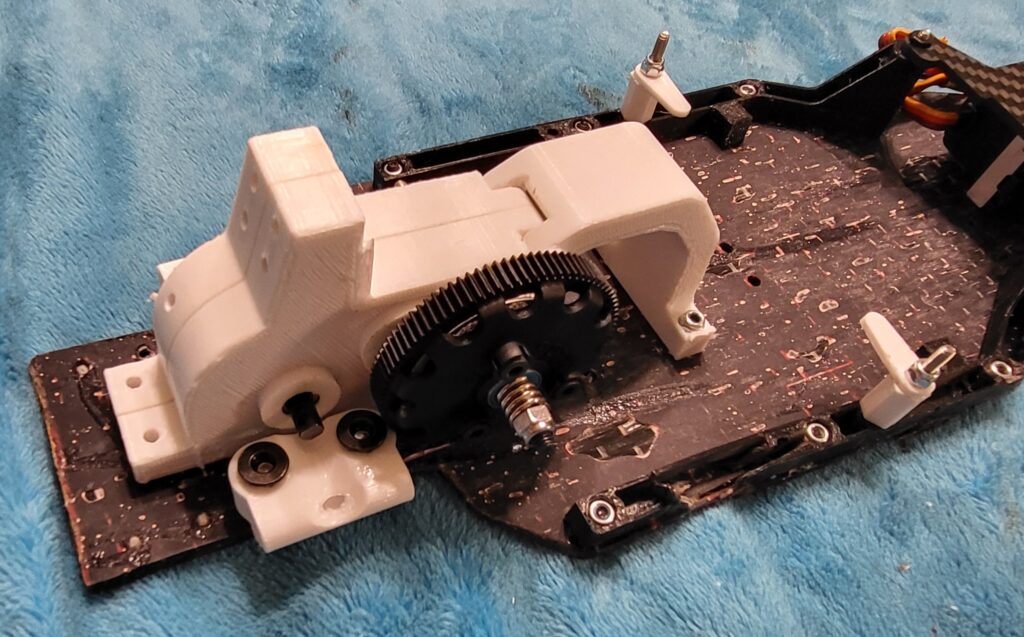
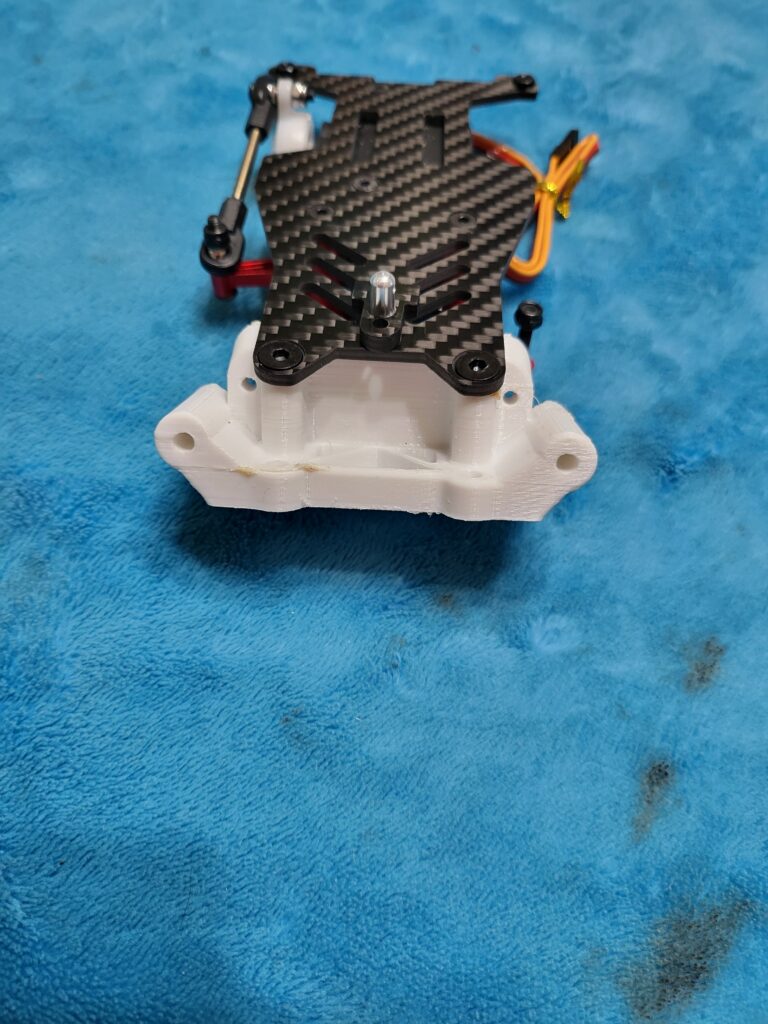
Installing the transmission was a simple affair. Each screw fell rlght into place and the captured nuts were a big help. The slipper assembly will be coming back off to mount the motor plate once its finished but this shot gives a good idea as to what the finished product will look like.
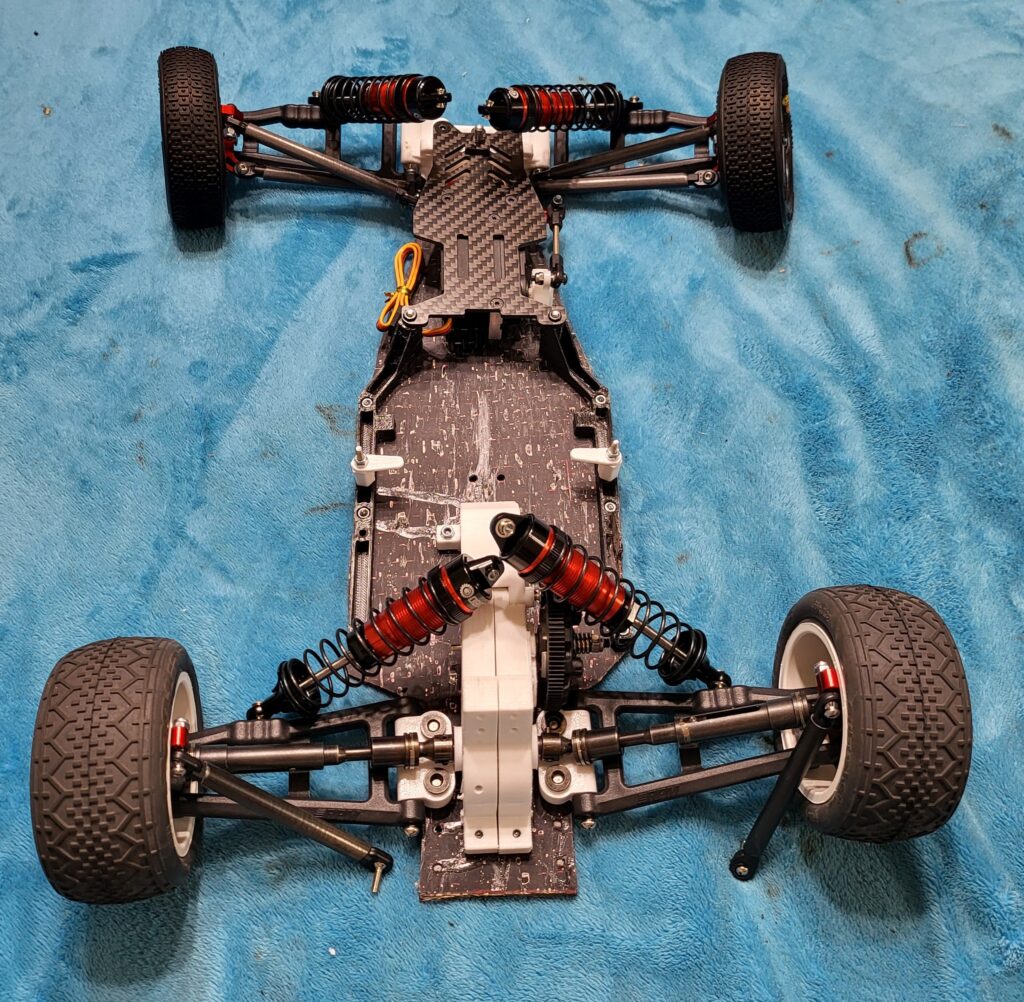
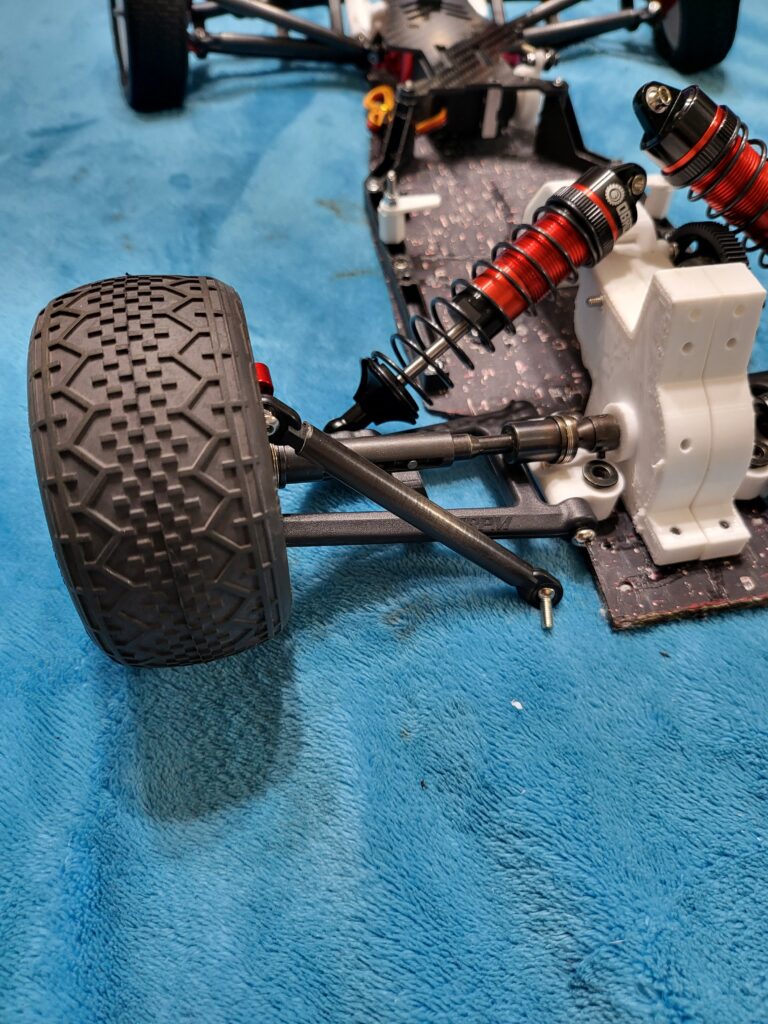
These shots show the RPM rear arms installed at all four corners. For the fronts the caster block needs to be rearmed slightly to fit the larger king pin and an M4 lock nut (non-flanged) gets installed as a spacer on the inner hinge pins; otherwise this is a simple, bolt-on process, For the rear I flipped the camber link to the rear of the knuckle to allow it to line up with the soon-to-be-printed camber link mount as well to allow it to clear the shock assembly.