
As a child of a coal mining family I spent my summers vacationing in Myrtle Beach, South Carolina and consider Horry County my home-away-from-home. Driving next to the Intercoastal Waterway lets me know that I’m almost there. Seeing the ocean for the first time when driving in on 501 (at 8th ave N, where the Pavilion was formerly located) still causes my heart to skip a beat and I’ve done that drive more than 40 times in my life. Smelling the salt in the air, hearing the sea gulls call out from the distance, the initial smack of the humidity when you step out of an air conditioned car, its a very zen experience. I’ve taken the opportunity to do some RC’ing at the beach just once, with my original 3906 E-Maxx and to this day it still has grains of MBSC sand stuck in those hard to reach places. I’ve always wanted to build something simpler and much faster just to rip up the sand with and now I’ve decided to repurpose a bunch of Slash 2wd parts into a rip that is ready to tear it up oceanside.
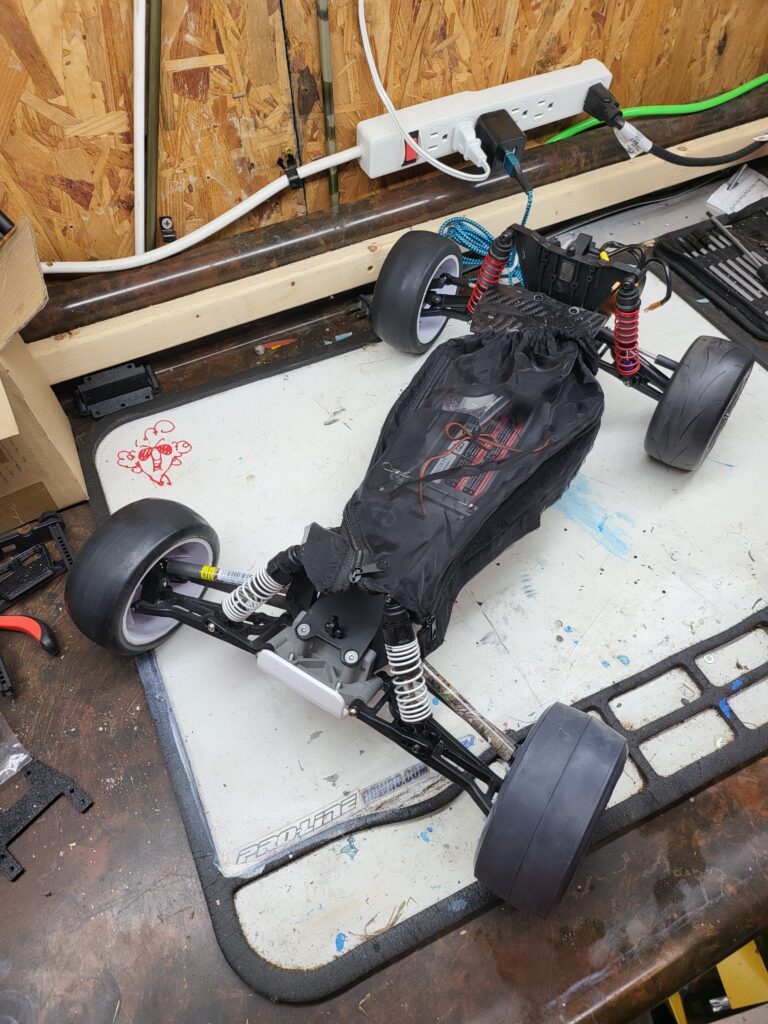
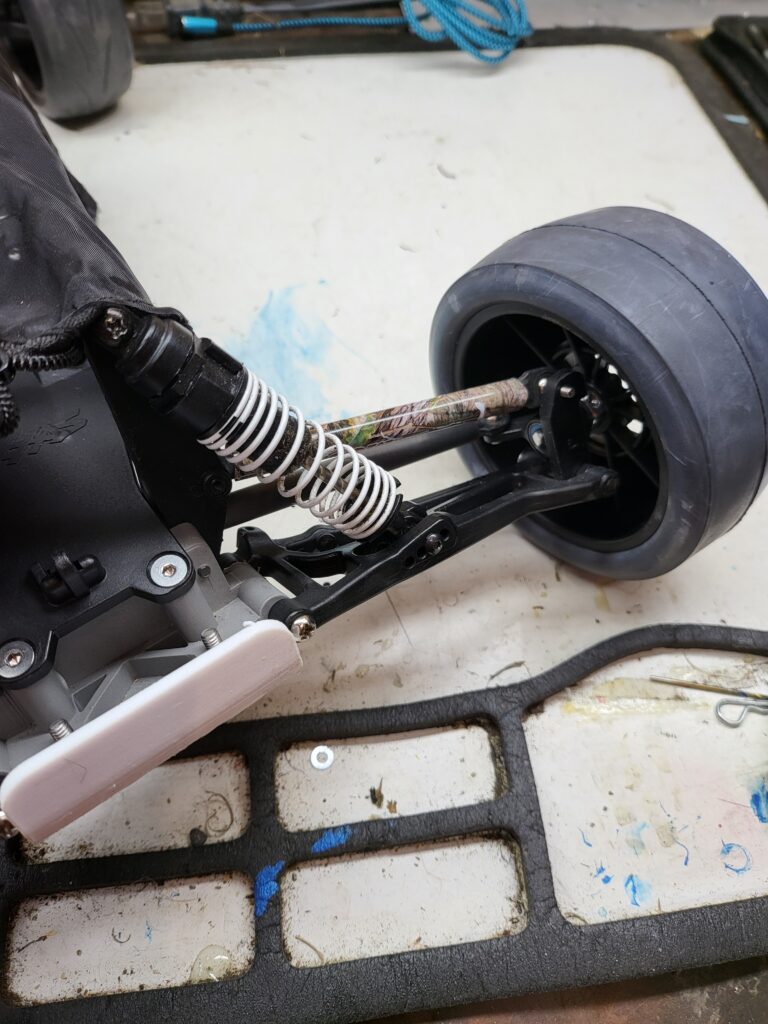
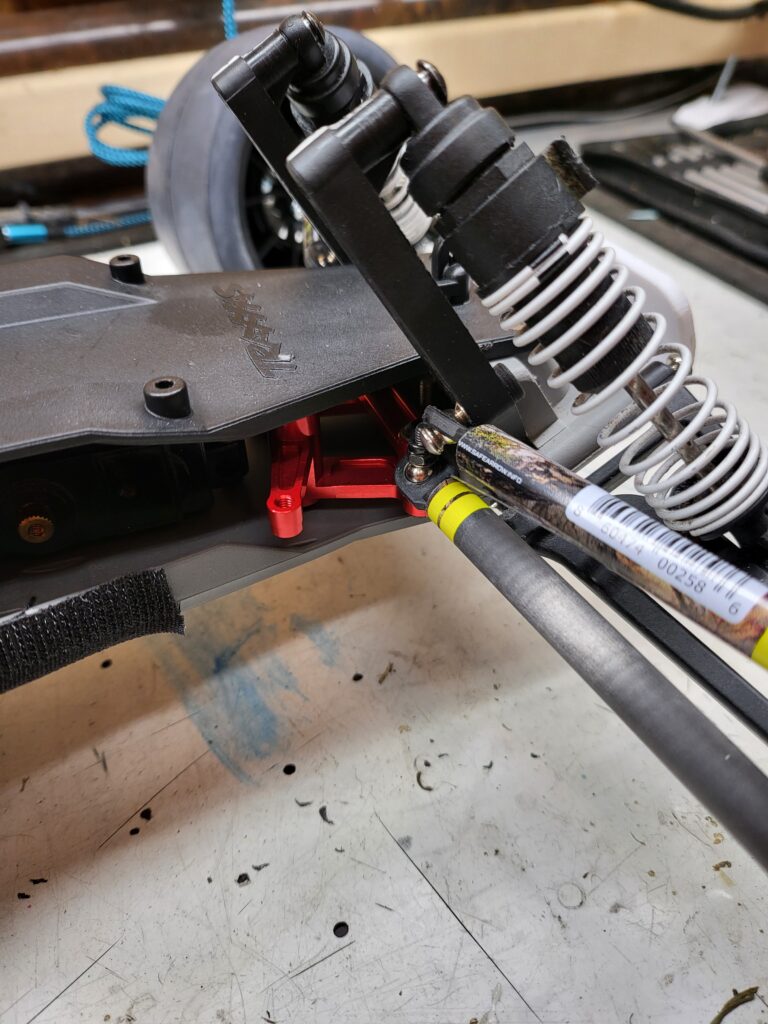
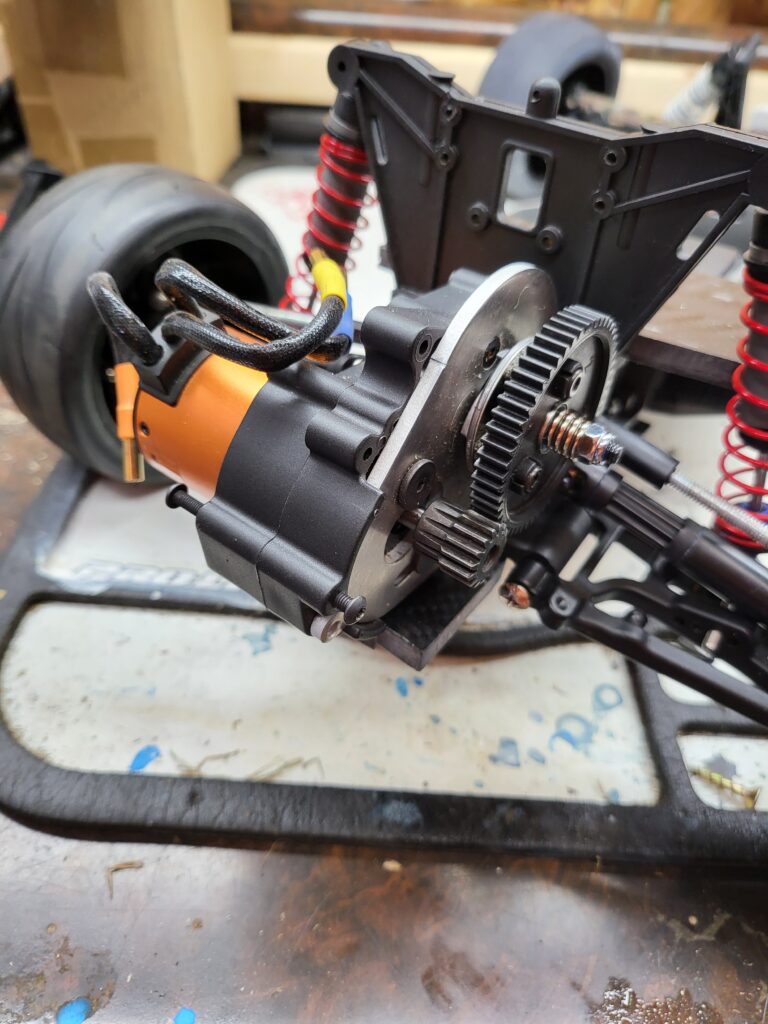
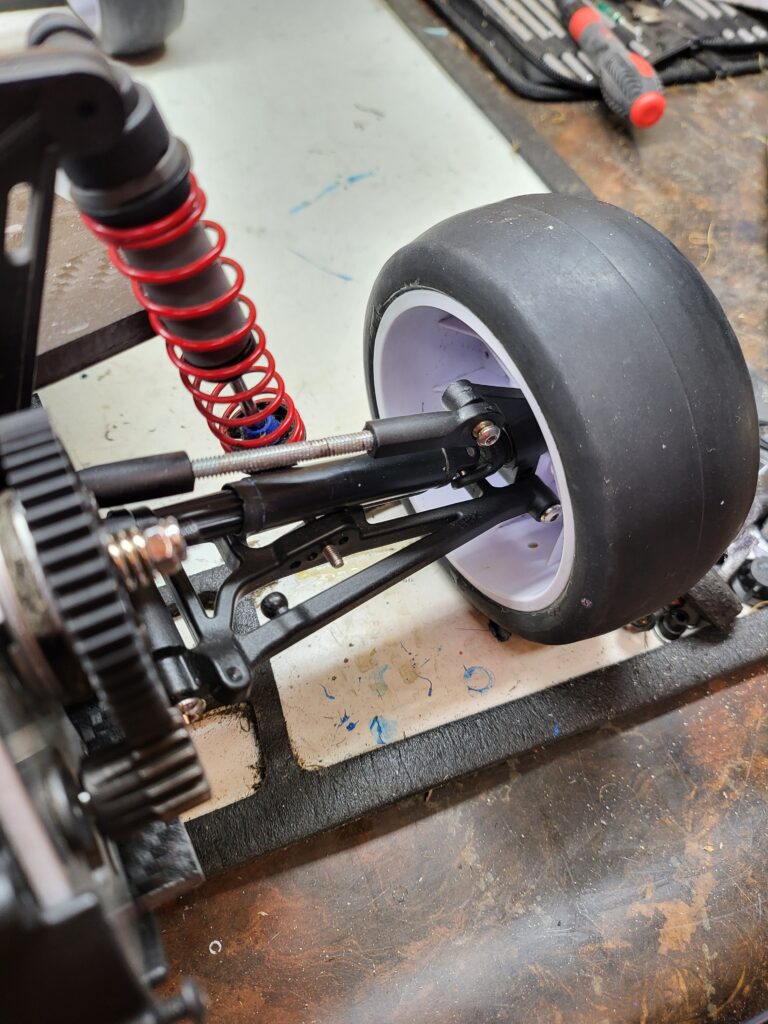
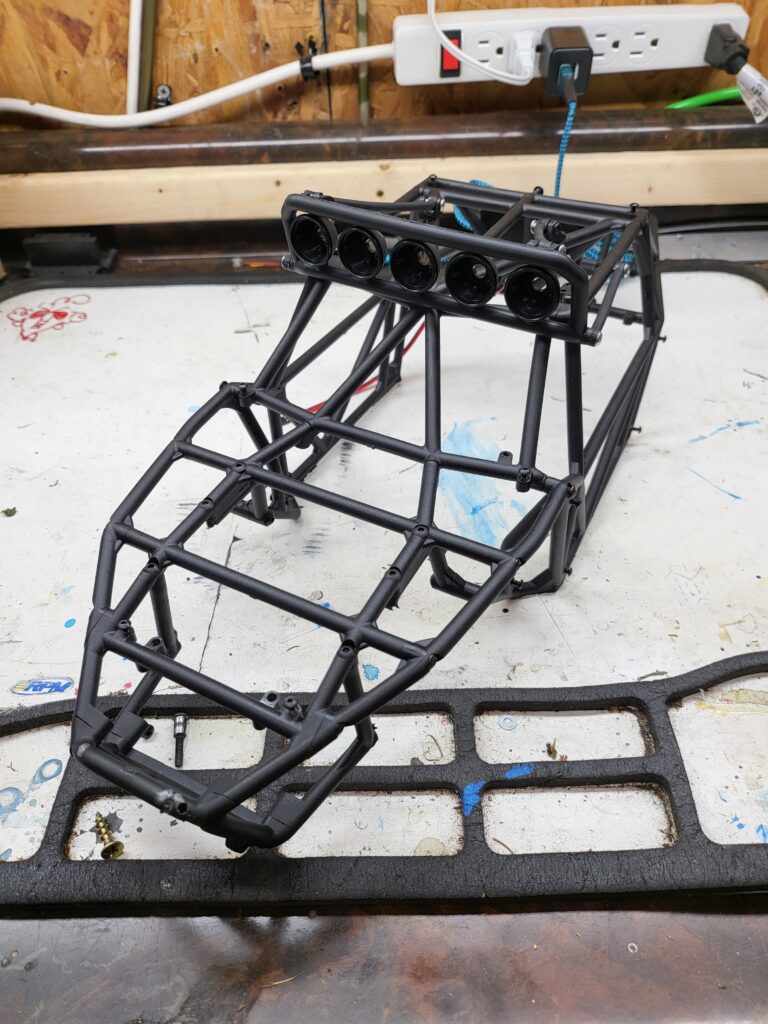
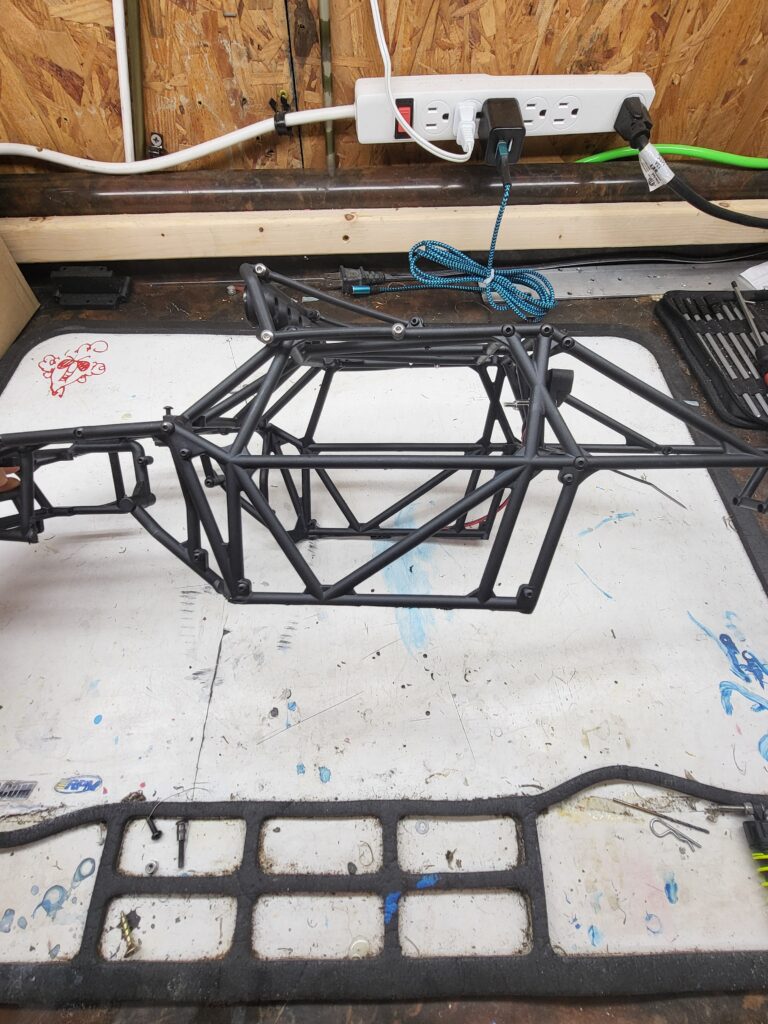
I had a spare Rustler upper and lower chassis in the parts bin so that became the base for this build. I have STL files for printing chassis extensions (these are similar to the ones used in WT(FWD), just a little thicker) and used that method to stretch the wheelbase. I planned to use an Element Gatekeeper roll cage as the body and the Slash’s wheelbase is just a little long but works fairly well. I will be switching the car to a standard Traxxas LCG chassis in the near future just for appearance sake. Being 85% blind I did my best to cut things straight and true but alas the band saw had other ideas… Stock shock towers bookend the chassis and are the home for two sets of Traxxas XXL big bore dampers. These longer shocks are found on the rear of a Stampede or Rustler 2wd and are needed for the Jato arm conversion this car also has. Custom carbon links add a touch of style and the front toe links are attached to aluminum bellcranks. Jato front arms are found at all four corners and extend the width of a stock Rustler by a significant amount so the Slash on which this is based looks extremely narrow in comparison. A black RPM HD transmission case is stuffed with all steel gears, a sealed differential with 50k diff fluid, a 272R one piece top shaft and a Jato 54t spur. Hybrid Jato/Slash 4×4 driveshafts transfer power to the wheels and are comprised of HD outputs, Jato center sliders and Slash 4×4 stub axles. These are the strongest plastic axle I’ve built for Jato widened trucks and I definitely prefer them despite their increased cost.
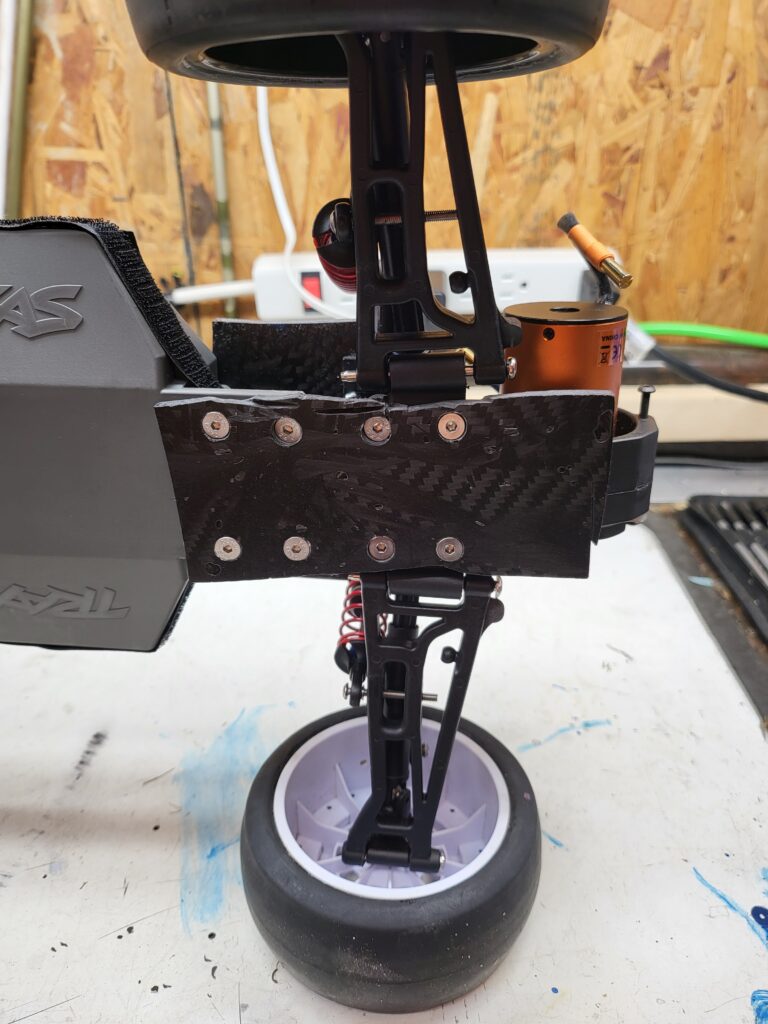
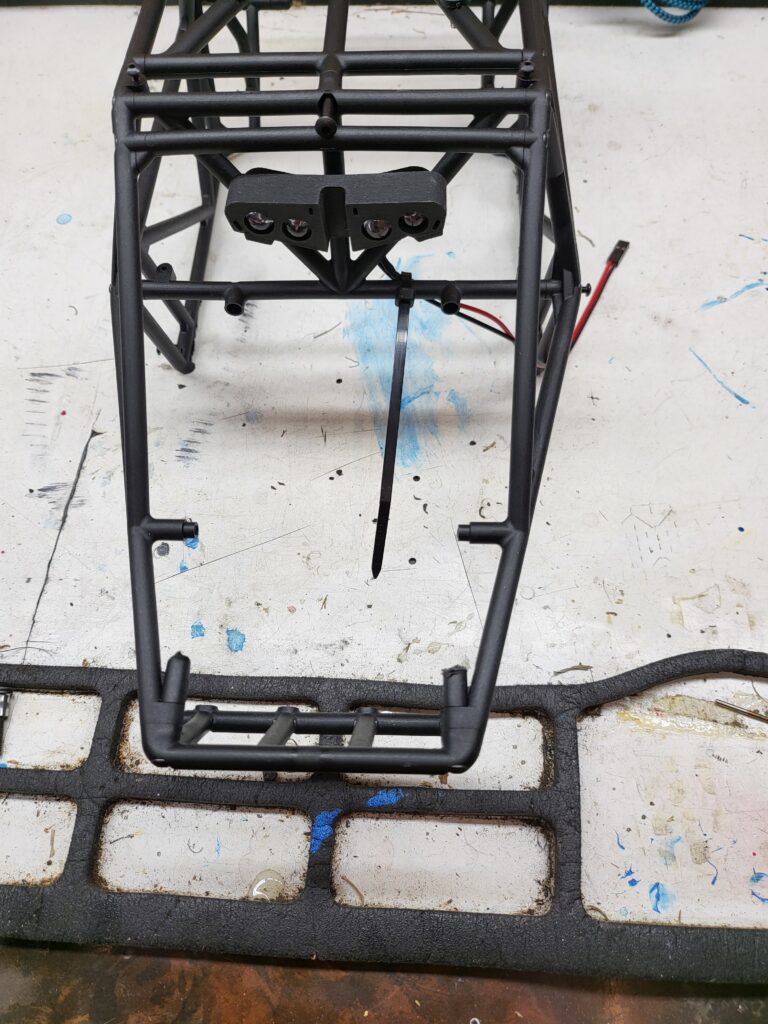
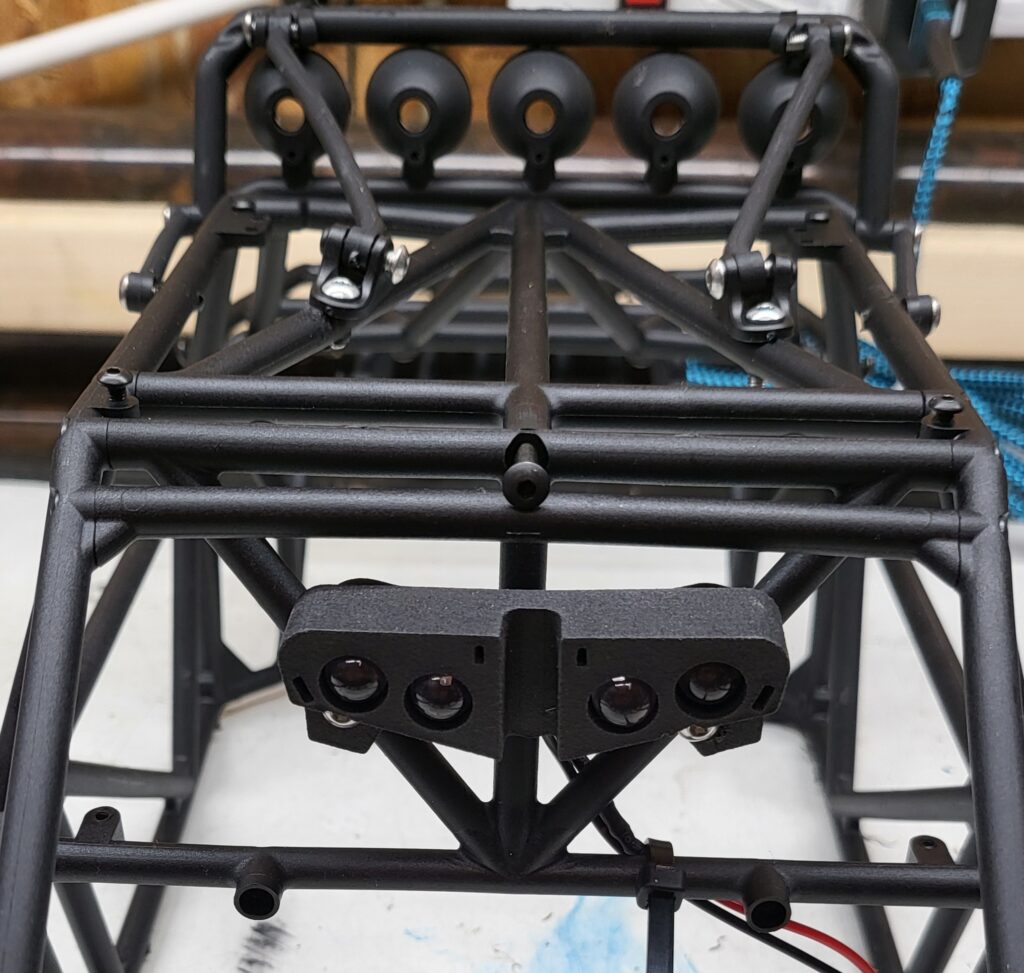
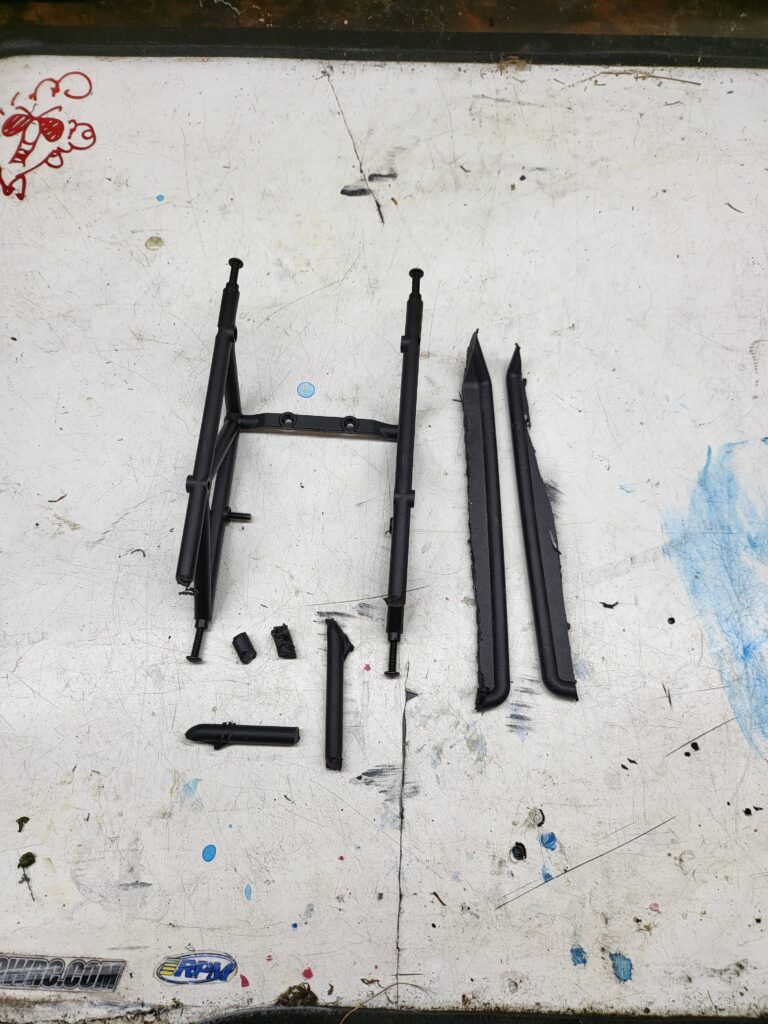
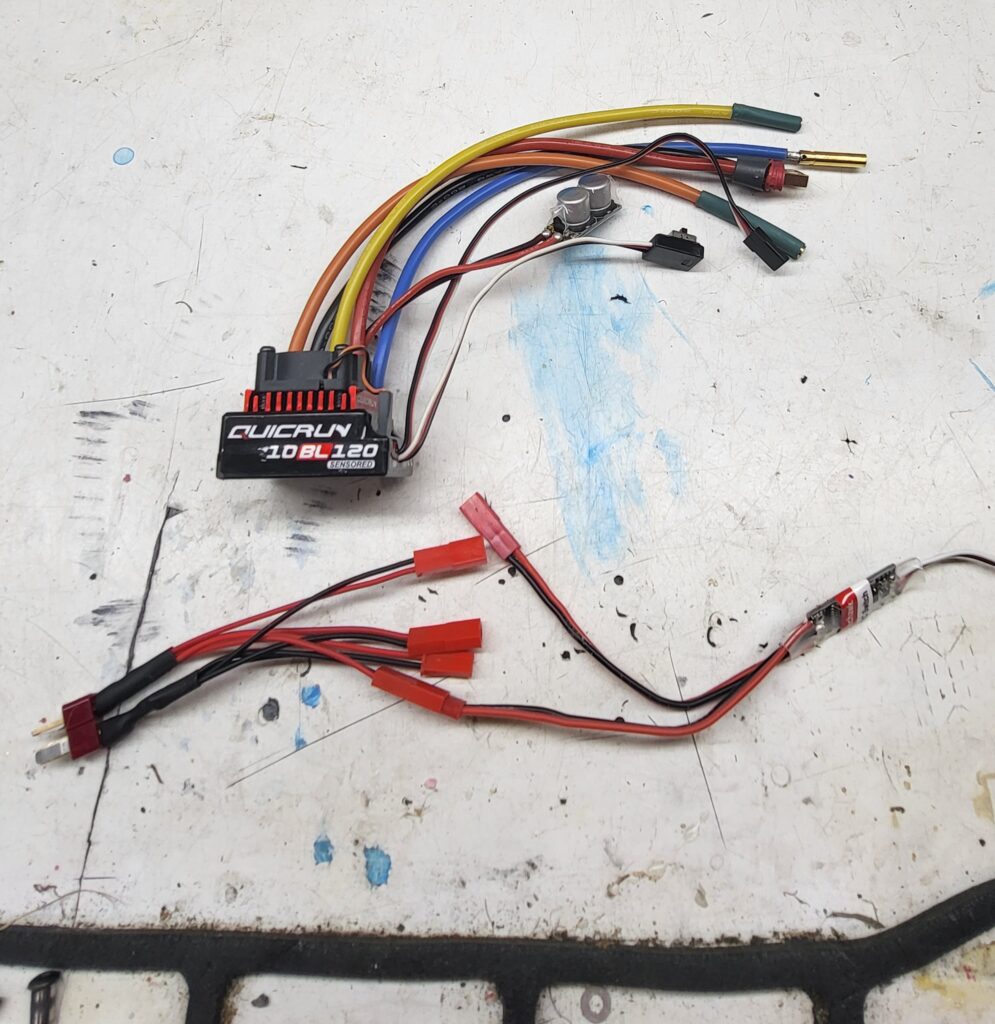
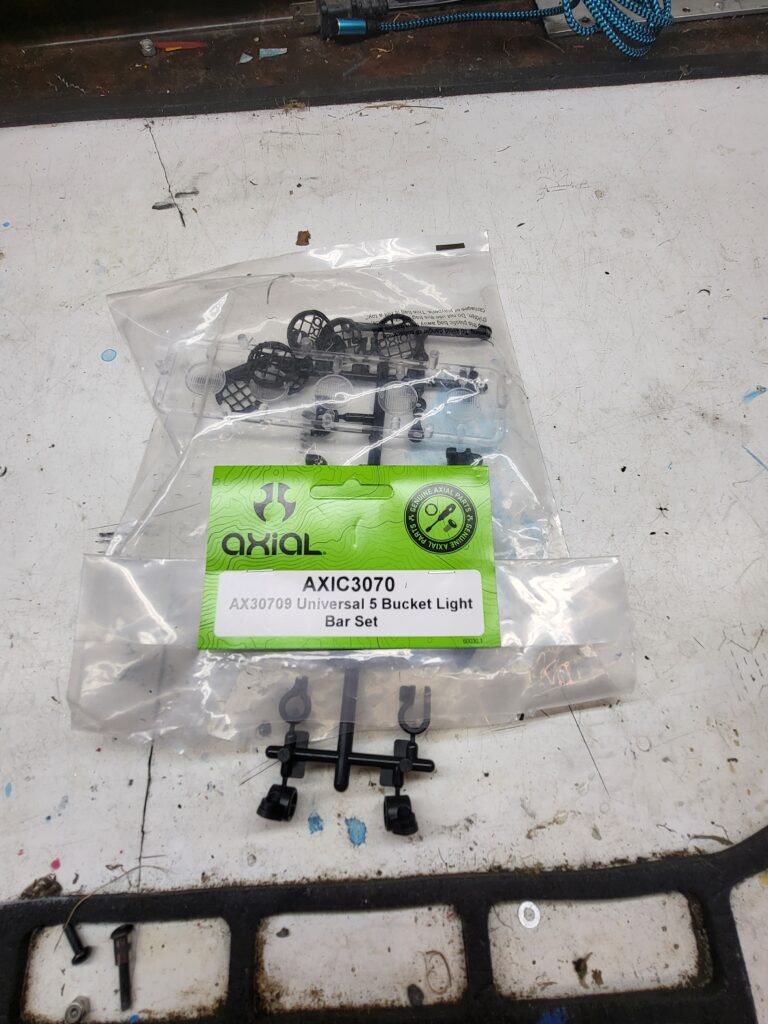
Moving on to the cage I procured a Gatekeeper cage from Ebay for a good deal and started cutting tubes off until it fit on the chassis. The rear electronics mount tray gets removed entirely and there are a few other pieces that get removed but it is not the Dremel-fest that I expected it to be. The shot below shows all of the pieces that were removed. I did remvove the lower tubes from the side of the cage to lower the cage onto the chassis a little better and now it sits in a more scale location than before. On the sides of the chassis are strips of heavy duty hook and loop tape that secures a breathable chassis cover to keep sand out of the electronics and this same piece will be used on the new chassis as well. On the roof of the car will be an Axial universal 5-light light pod and the rear gets a 4-led red light bar. The nose of the car is home to a 3s powered 1.5″ LED light bar from Powershift Technologies. This little bar throws some light down the beach for sure! I will be running 3s on the roof lights as well but the rear bar is limited to 2s only. A Hobbywing 10BL120 transfers all of the voltage from the battery to the motor without straining and the 3660 GoolRC motor is a torque monster (even though its a 4300kV unit). Please ignore the mixed slick tires, they were just what was closest to my bench when I mocked this car up; my plan is to use Pro-Line Dumont SC rear tires and Mohawk fronts to nail the look of a real sand rail. Future plans also include a hinge for the front of the cage, custom rear body mounts, a 3rd channel switch to turn on the lights, an aluminum servo horn and 40kg servo as well the aforementioned LCG chassis. As a quick tip for those running in the sand, use a bit of CowRC Moo Slick or PB Blaster Dry Silicone spray on the chassis and suspension components to keep sand from sticking in the first place; the less that sticks initially, the less you have to clean!
PROGRESS!
Over the recent weeks I’ve manage to acquire a few new parts for the sand rail including a new Traxxas LCG chassis kit, a 1.5″ LED 3s light bar from Powershift RC Technologies, a 5-pod roof mounted light bar from Axial and a flexible rope light kit from Injora. The hope is that this car will be visible from a decent distance, even at night and with these additions I believe it will be.
The Axial universal 5-pod light bar is an all-inclusive kit that can be mounted to just about any vehicle thanks to its numerous mounting options. I mounted the bar lower on the brow of the windshield, ala the way Toyota mounted their lights inside the windshield frame of their SR5 desert trucks back in the early 90’s. This arrangement also keeps the overal profile of the car lower for a more sleek appearance. Five, 5mm white LED’s fill the pods and are wired in series to a standard JST plug inside the roll cage. These LED’s can handle 3s power and will be fed volts by a remote switch along with the nose mounted LED light bar from Powershift RC Technologies, also shown in this photo.
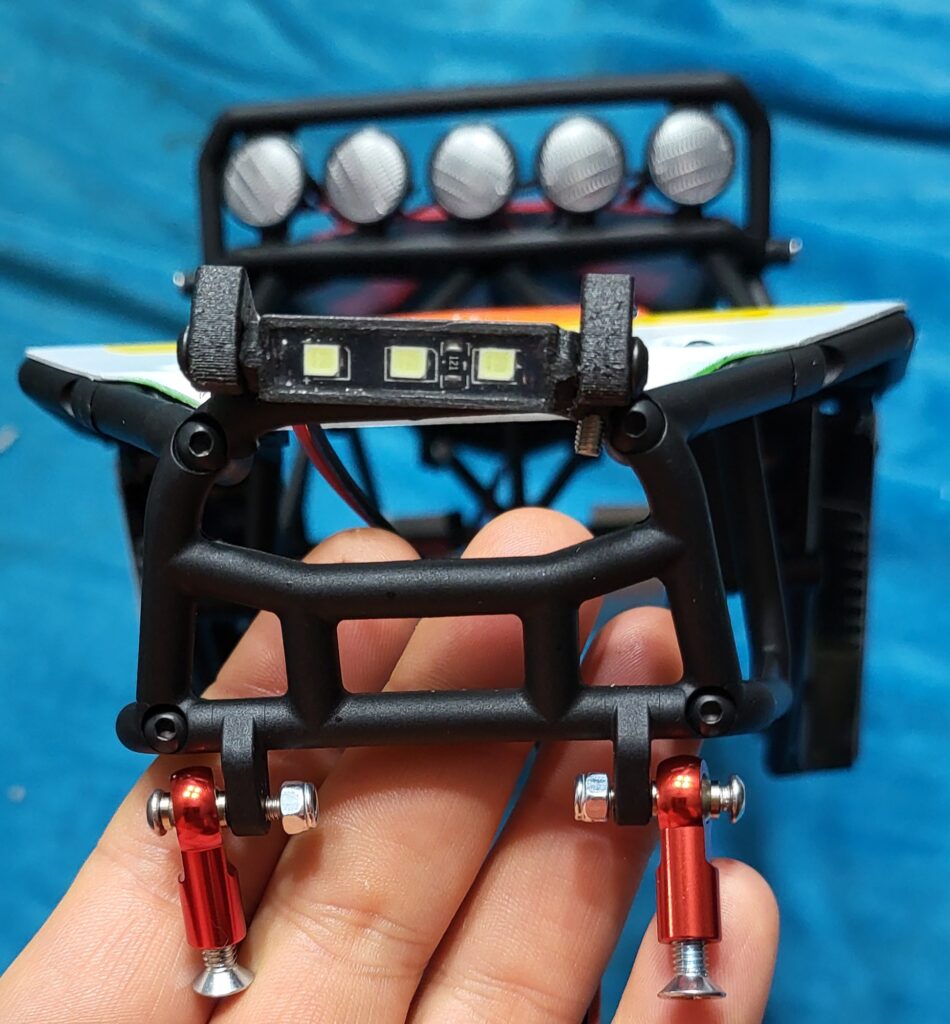
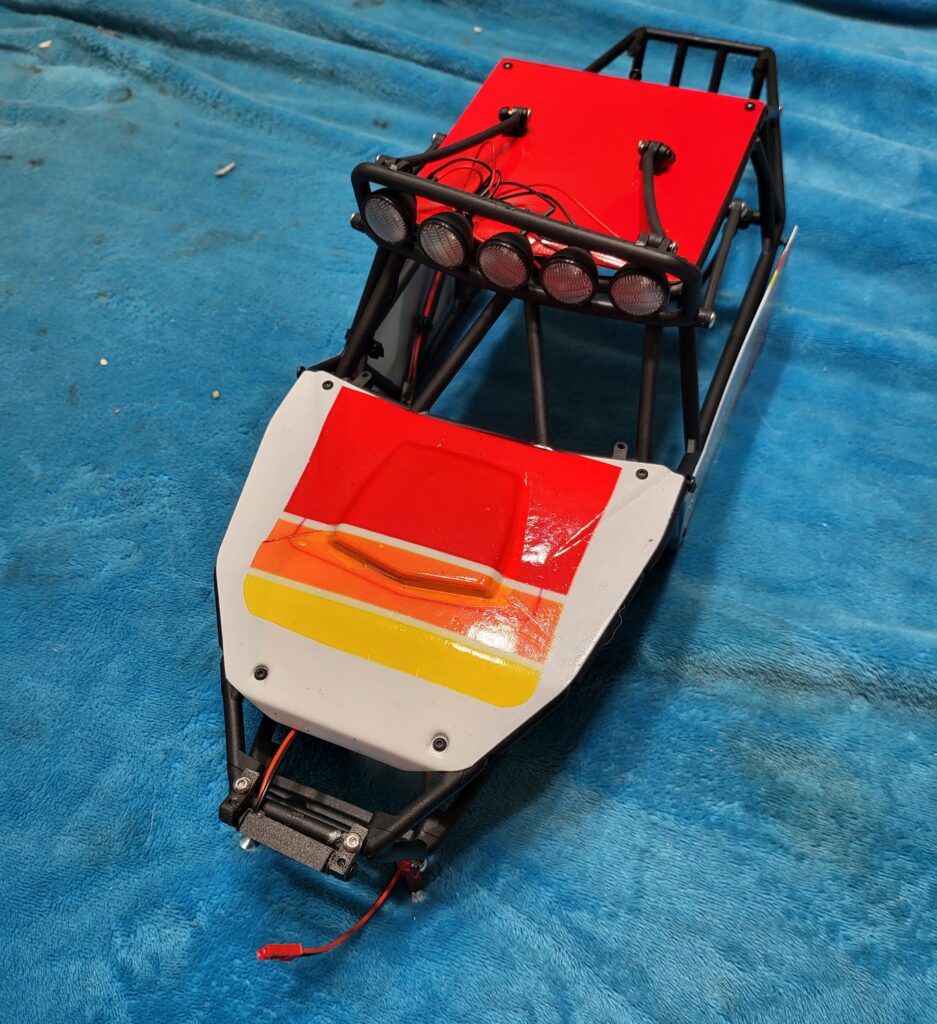
In this head-on shot the 1.5″ light bar stands proud on the upper bar of the roll cage and the newly installed hinge can be seen bolted to its lower section. This hinge, made of simple M4 rod ends, will attach to an aluminum front bumper and allow the entire roll cage to lift up and out of the way. In the rear, two plastic rod ends are attached directly to the cage and find their home on corresponding Traxxas battery posts (TRA3727a, for teh Rustler, Bandit or Stampede 2wd).
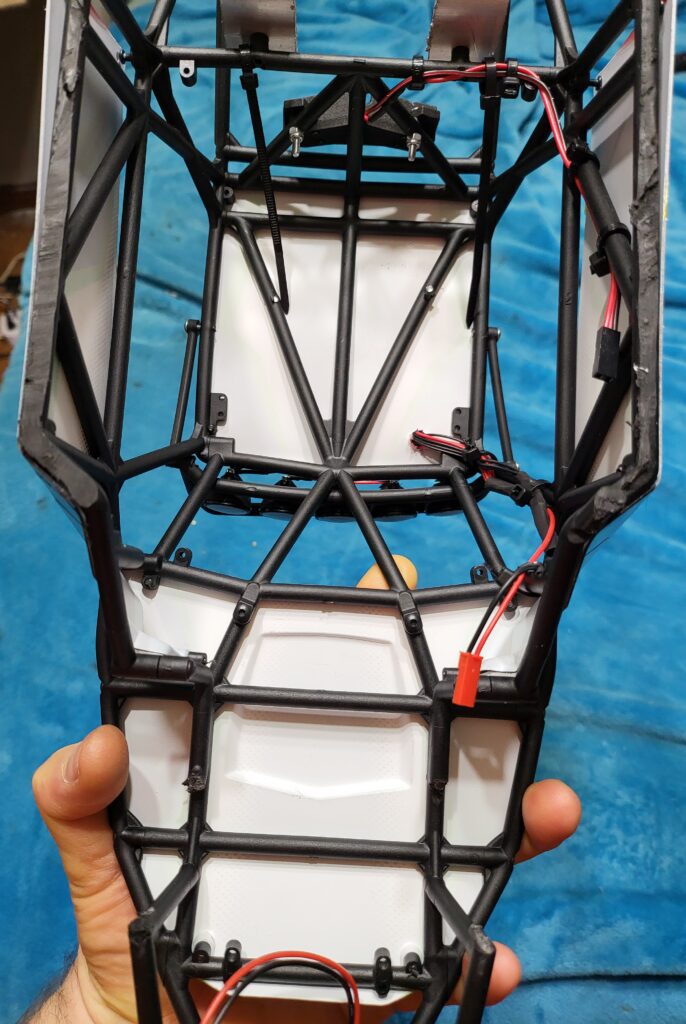
This under cage shot shows the beginnings of the cable-ing that will become the light kit. The roof LED’s and front 1.5″ light bar will run 3s while the rear LED’s and as-of-yet-fashioned LED whips will run off of standard receiver current. The Amazon sourced switch is an eight amp unit that I have used on several other projects and works surprisingly well for an $8 part. This arrangement allows the main lights to be controlled by an auxiliary channel on my Radiolink RC6GSv3 transmitter.
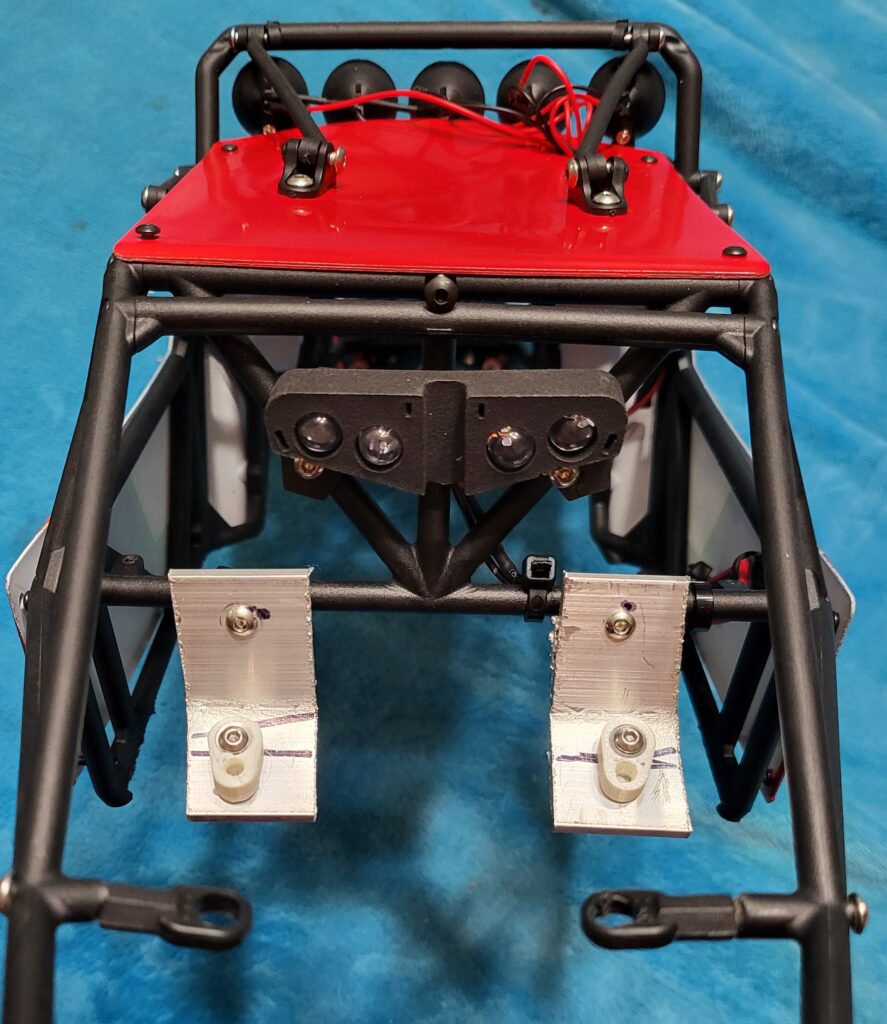
In this photo we find the red LED light bar that faces rearward as well as the beginnings of the LED whip light mounts. These small pieces of aluminum are fitted with 3d printed antenna mounts that will hold the LED whips once they are finished. The rear cage hold downs can also be seen in this photo; simple Traxxas rod ends attached to existing holes in the Element roll cage. This arrangement allows the rear of the cage to be freed from the chassis with the removal of only two body clips, making battery changes a breeze. The cables feeding the lights will extend forward to the hinge point before tracing back to the receiver box, meaning the light kit will not be affected by the movement of the cage.
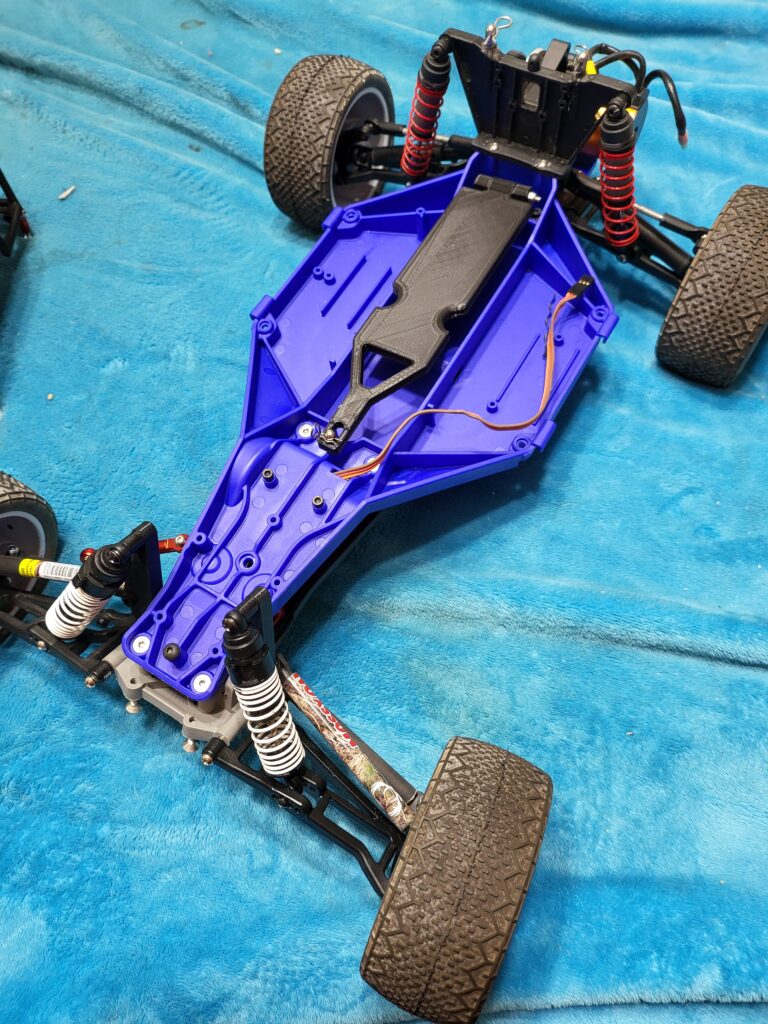
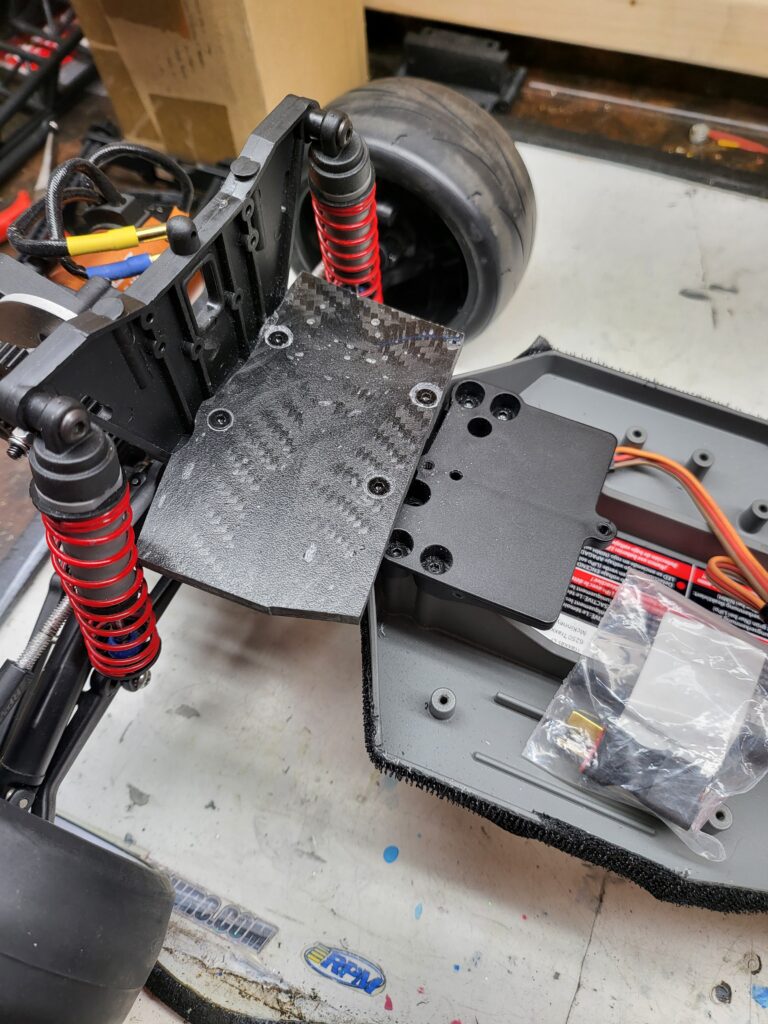
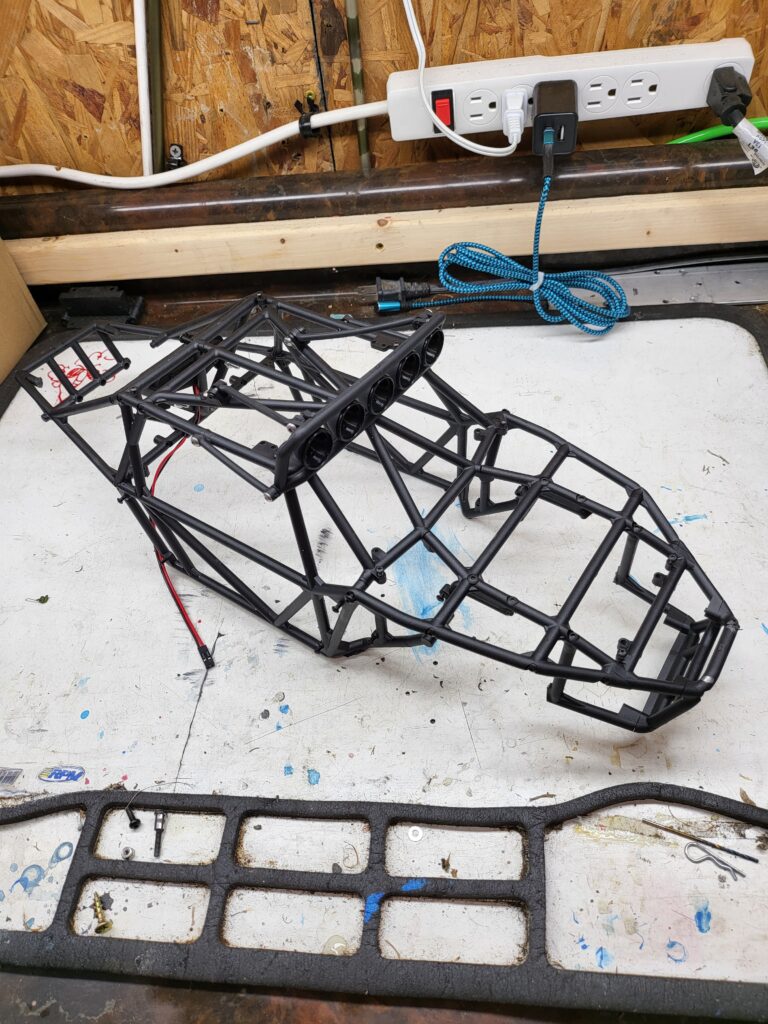
Finally, we’ve all seen a Traxxas LCG chassis so this photo is nothing new. I will be dyeing the chassis black to help it disappear under the cage and will also be adding the hook-and-loop fasteners to the chassis sides, giving the chassis cover a permanent home. Short of ordering wheels and tires and fabricating the LED whips this project is nearly done. Now just to find my way to the beach…