
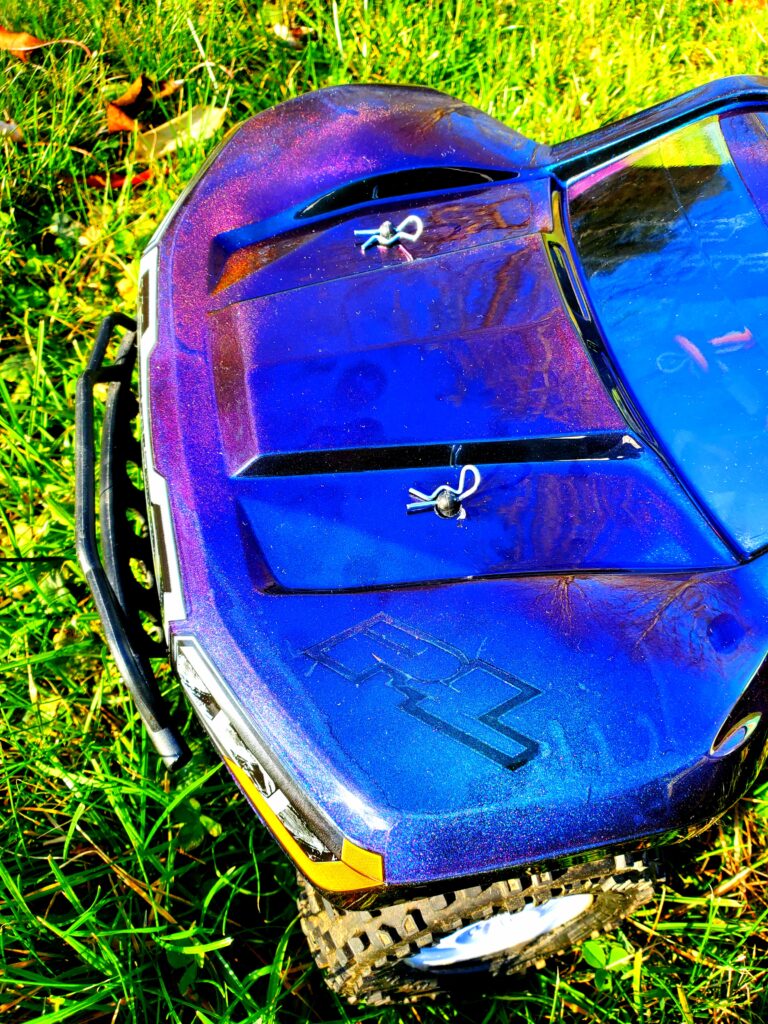
After my experience painting the Pro-Line Fusion FloTek with Spaz Stix (article found here: https://1i-rc.com/color-changing-paint-simple-steps-to-a-stunning-shell/ ) I wanted to try some of their other finishes on the new Axis SC shell. Its angular cab mixed with its rounded fenders would allow the color change paint to show its true colors in the most dramatic way. For this project I used the Spaz Stix Orange/Purple/Teal (#05209) as the main color but wanted to do something a little more subtle for the graphics. I chose to add a few Pro-Line logos to accent the main color but didn’t want them to be the main focal point. To accomplish this I used the remaining Gold/Green/Orange/Purple (#05509) from the last project to allow the graphics to stand out slightly in some light conditions while disappearing in others. The process was fairly simple and with the right materials can yield impressive results.
Step 1: Clean, clean and clean some more…
After trimming the body Dawn dish soap was used to remove any mold release agent or oily fingerprint smudges. The Spaz Stix paint is very sensitive to contaminants and this step cannot be overlooked.
Step 2: Masking and graphic placement
At this point apply the window masks as you normally would, being careful to not touch the body in any areas that paint will touch. I had the Pro-Line logos cut in reverse as they needed to be placed on the inside of the body. While placing the graphics in their final location I used a small vinyl burnishing tool to fully adhere the graphics before removing the transfer tape.
Step 3: Pre-Prep Spray
Just as with the Fusion Flo Tek, I applied two mist coats of Ultimate Pre-Prep spray (#90059). These coats go on very thin; if the paint looks wet at all it is too thick. The Pre-Prep should dry almost immediately when once it hits the surface. Allow each coat to dry fully before spraying the next. The body will still be 100% clear at this point.
Step 4: Color Coats
The color changing paints require three to four coats for maximum color impact. Each coat gets laid down as a medium wet coat and allowed to dry before moving on to the next coat. After each coat the body will look more and more translucent, taking on a nearly frosted finish after the fourth coat. Applying too thick of a coat or too many coats can reduce the color change effect in the end, three or four coats seems to be the sweet spot.
Step 5: Back In Black
The color change paint relies on a black backing coat to allow the pigments in the mid-coat clear (the color changing paint) to appear. I applied two coats of Createx Opaque Black (#5211) in a medium to heavy fashion. These two coats provided complete coverage behind the Spaz Stix and exhibited no chemical reaction between the two.
Step 6: Unmask and Repeat:
At this point I removed the paint masks from the Pro-Line logos and applied two new coats of Pre-Prep spray to the newly exposed clear areas. Once these coats dry I applied four new coats of the God/Green/Orange/Purple allowing each to dry before moving on.
Step 7: Back in Black, Part Deux
As before, two coats of the inky Createx 5211 were applied and allowed to dry. Observing the body from the outside shows that the graphics are opaque and do stand out in some lighting situations.
Step 8: Cleared For Landing
I always apply a backing clear to my bodies for durability sake. It prevents any debris from scuffing or chipping the actual paint finish, this step is especially vital for off-road body shells or an body that may see hard impacts. For this shell I used Createx 4052 UVLS Matte Clear as a protectant. I applied three medium wet coats to build a higher layer thickness and allowed each to dry before moving on to the next. The matte clear combined with the opaque black yielded a satin finish that matches the sheen of undercoating quite well. Once dry, remove the window masks and overspray film and enjoy the fruits of your labor!
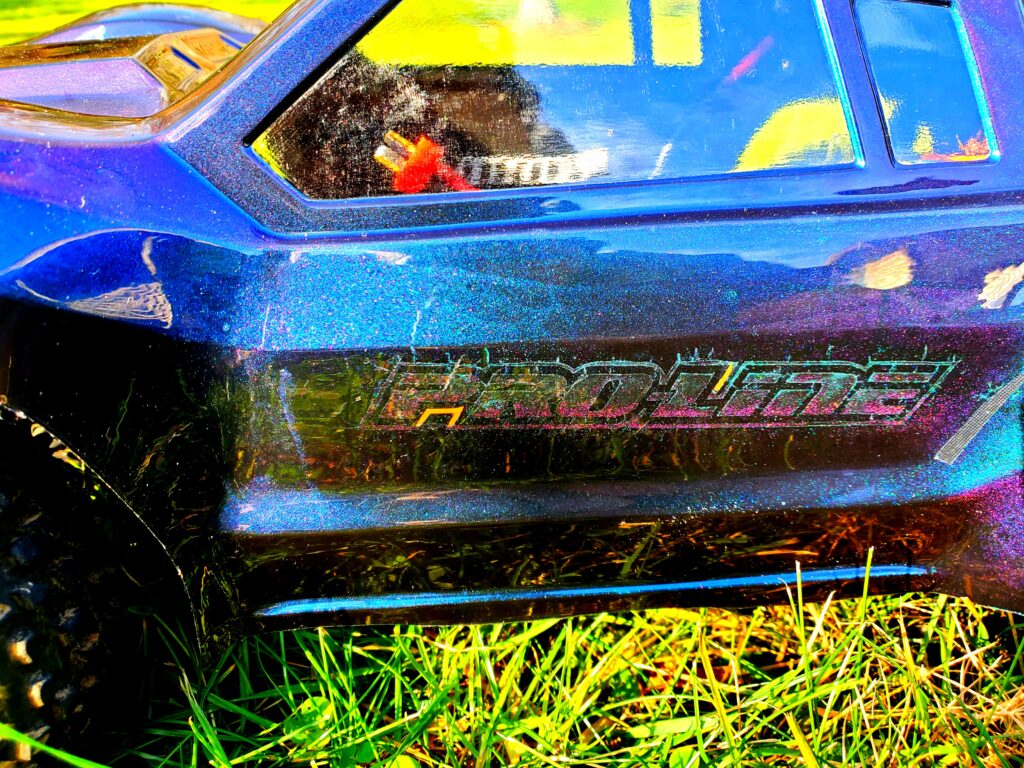
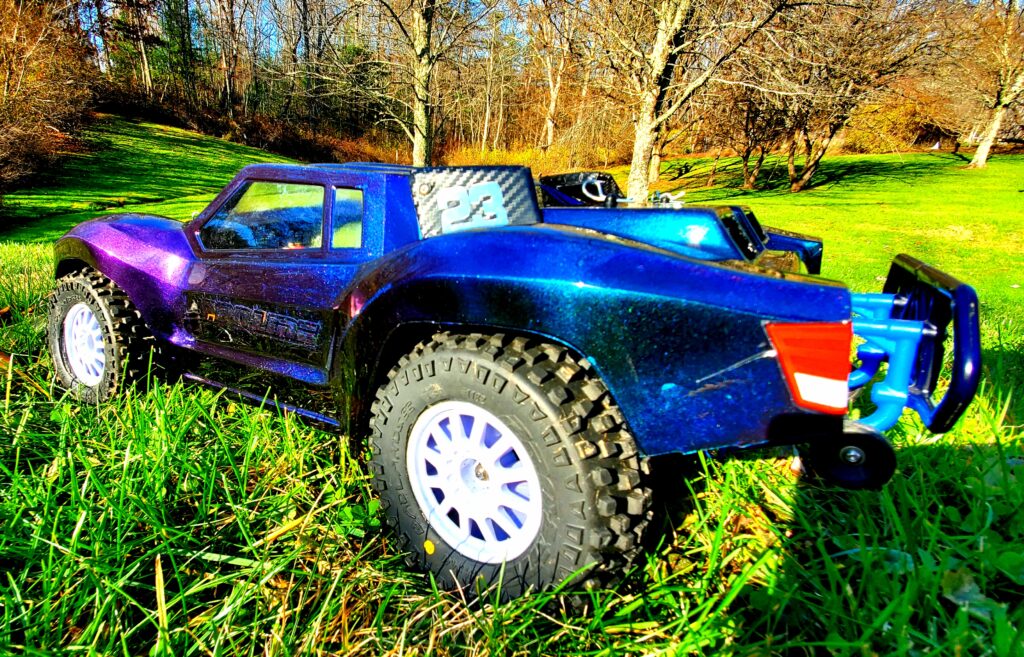
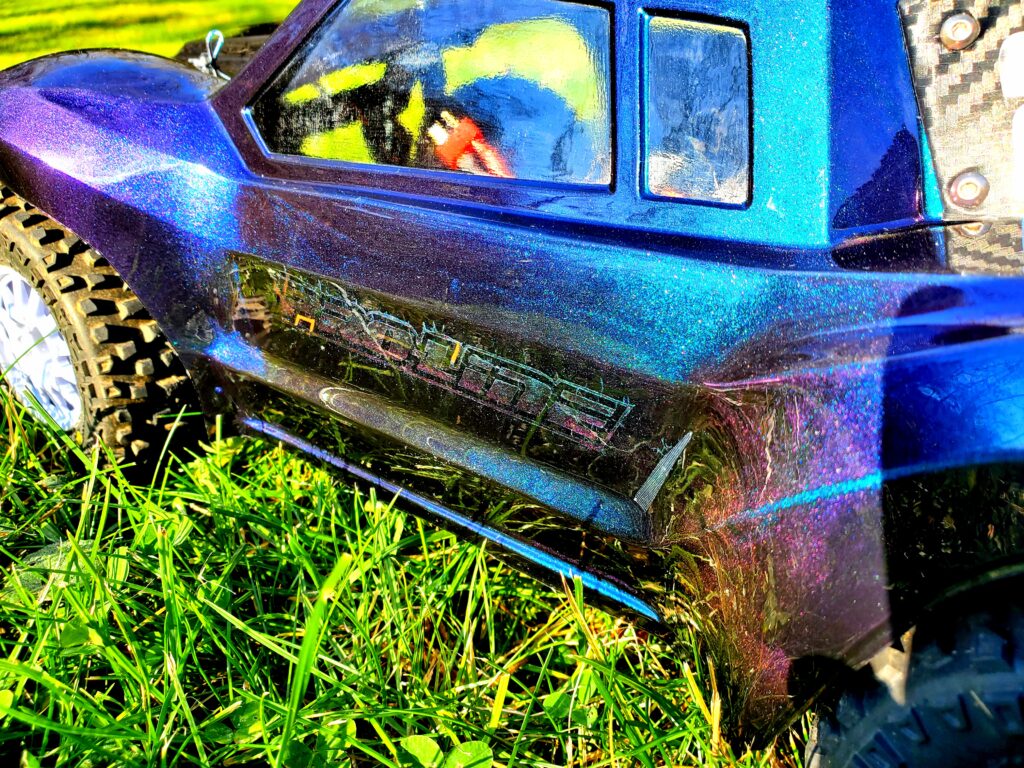
The effect is subtle and can only be seen in direct sunlight or when viewed from certain angles but is just what I was looking for. This technique can be applied to other finishes as well; ghost flames over hot-rod black, use a matching shade of the color change paint to hide the graphic in most lighting conditions, the possibilities are endless.
With the Spaz Stix paints, and most other paints as well, preparation and cleanliness is key. The paint does not tolerate contaminants well and must be applied in a certain manner to yield the desired results. It is not as forgiving as the Createx paints that I normally use which get applied fairly thick, are dried between coats with a hair dryer and don’t seen to mind the errant fingerprint as much. Follow the instructions on the can as well as some of the tips outlined above for the best results. It is not a difficult process and the results look amazing if the proper procedure is followed.