
Last year I pulled the trigger on an RC10B7 (the carpet car) and that car is just as impressive as you’d expect; its suspension is buttery smooth, the 5-gear transmission is surprisingly efficient given the amount of gear tooth contact and the steering is tight and precise. I enjoyed that build and even set the car up later to race dirt oval as it has a wide tuning window that allows it to adapt to many different surfaces. I prefer the gear diff of the B7 as opposed to the ball diff of the B7D but I would become intimately familiar with said diff as both the T7 and SC7 include the ball diff (although I did put a B7 gear diff in the SC7 as I am more comfortable with that unit for SC racing). While I did enjoy both builds immensely I found a few things that require extra attention and, unfortunately, was missing a part or two in both kits. I have reached out to Team Associated about this and am currently awaiting a reply. Let’s dive into the build!
BAG 1, STEP 2 and 3
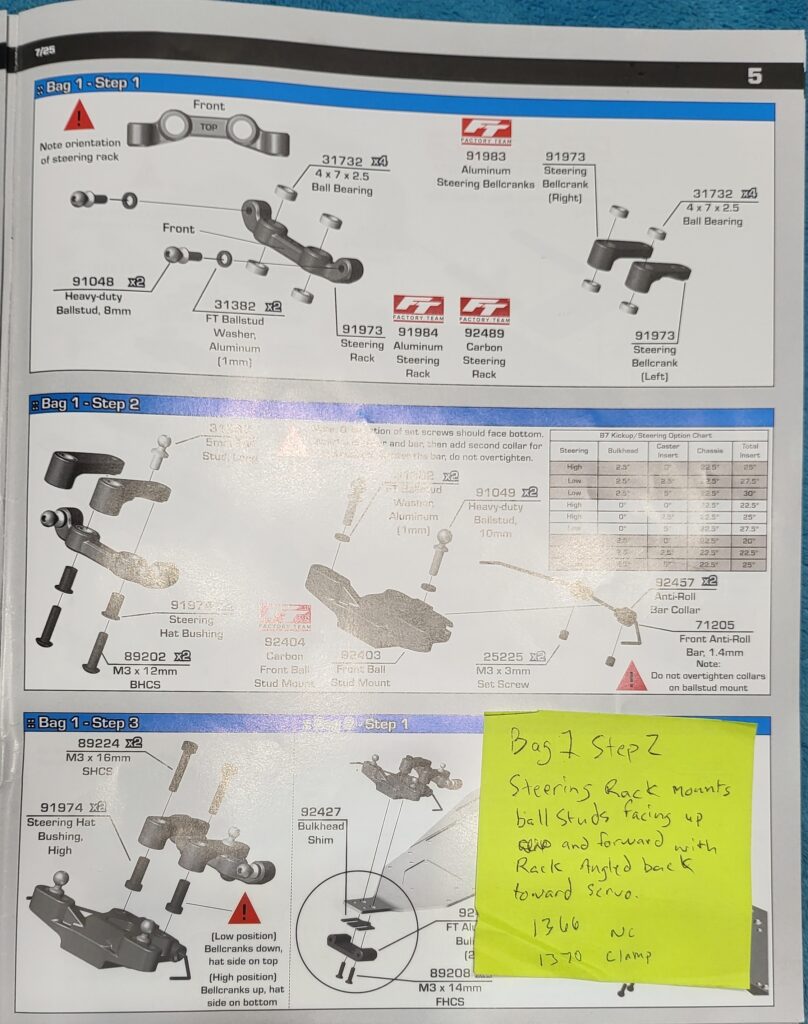
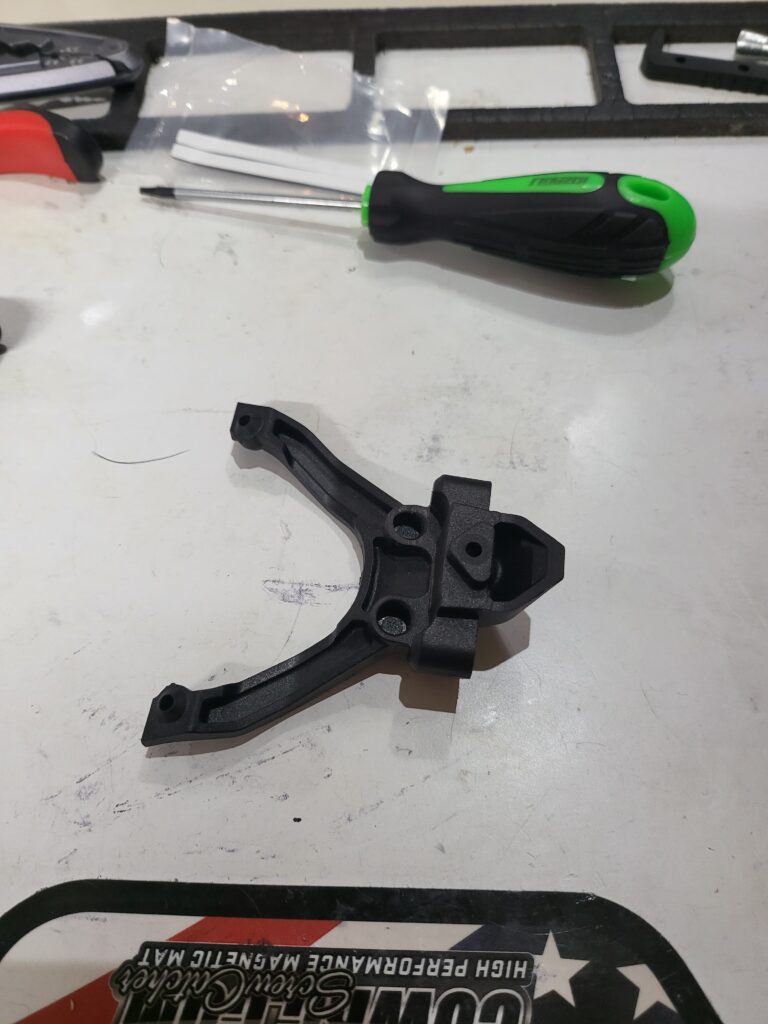
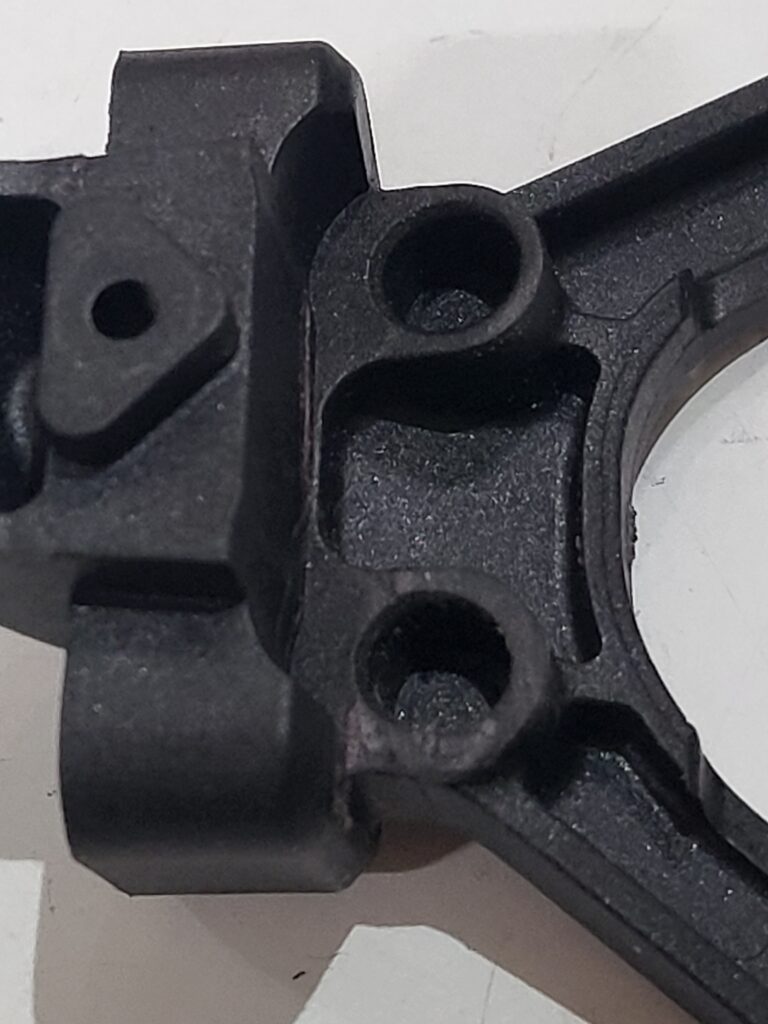
In this step pay close attention to how you install the ball studs for the steering turnbuckles as doing so incorrectly will result in binding and very little steering throw. The ball studs face forward and have one ball stud washer under them while the steering drag link should have the mounting ears sweeping rearward (the portion where the ball studs screw in to). The illustration is a little vague here and it can be easy to get this backward. Also, I used a 2mm ball stud washer under the ball stud that attaches the steering link from the servo to the bellcrank to alleviate binding in this area as well. Without the washer the ball stud screws through the bellcrank and out the bottom side, creating a point of interference. This was found on both trucks and for me a 2mm spacer is all that was needed. Finally, I had to remove .100″ from the pocket that the bellcrank screws sit into (the SHCS that secure the bellcranks to the front bulkhead assembly). I accomplished this with a file and took my time as to not remove too much material from the top deck. Once done, the steering will move smoothly with no slop or binding. Below are photos of the area that I modified as well as the trimming itself.
BAG 2, STEP 2
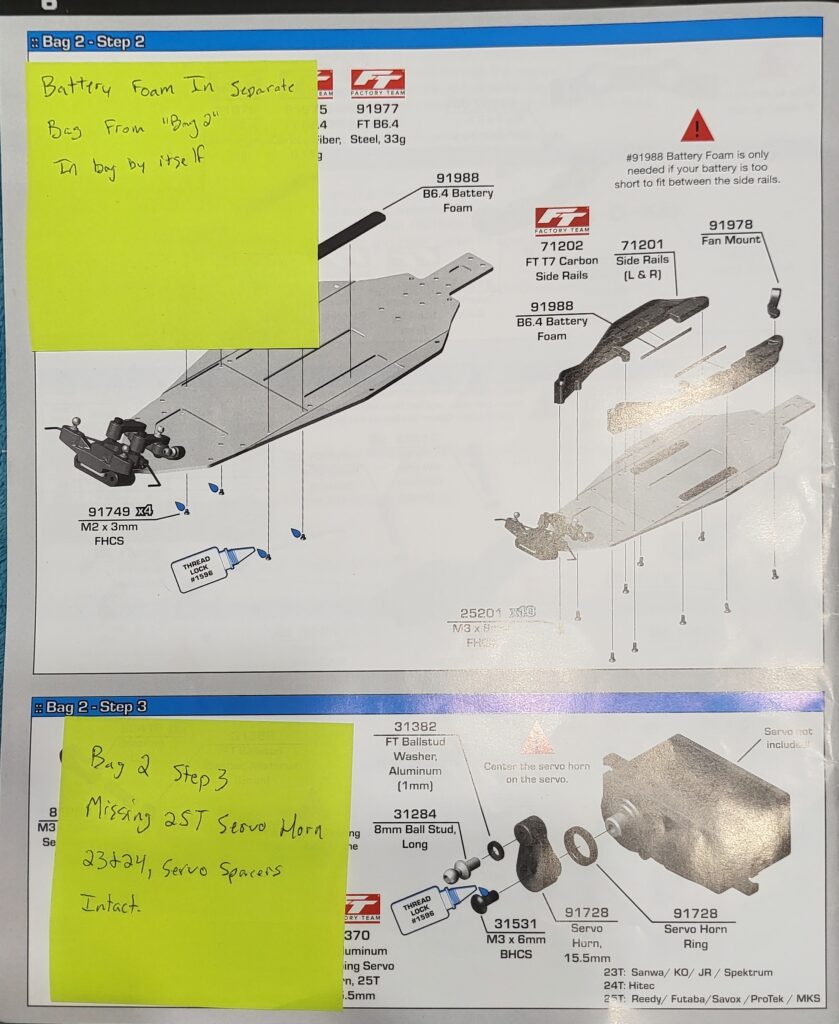
In this step I was unable to find the adhesive battery foam in bag 2 and instead found it in a bag by itself laying in the box, without a bag number on the label. If your kit is missing the foam in this step, check the box as it maybe floating around by itself.
BAG 4, STEP 1
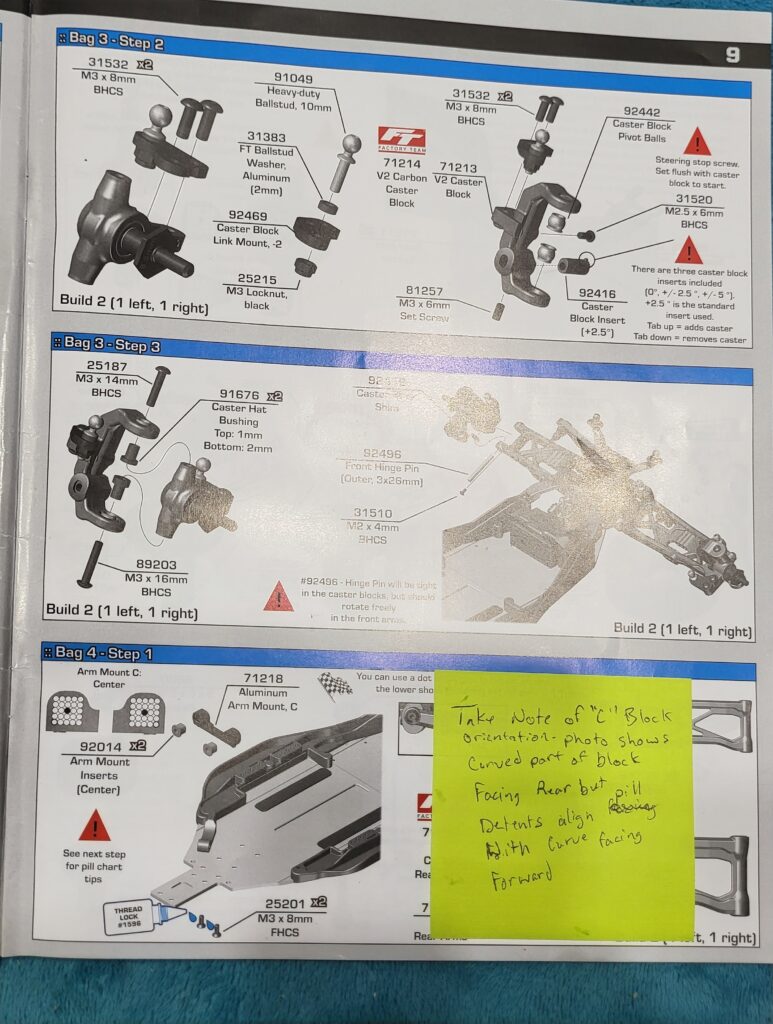
Take note of the “C” block’s orientation; in the instructions the curved portion faces rearward but this is incorrect as placing it that way has the pill pockets facing the wrong way. Place the “C” block with the pins inserted into their pockets in the chassis and the curved section facing forward to have the pill pockets in their proper location.
BAG 10, STEPS 1 and 2
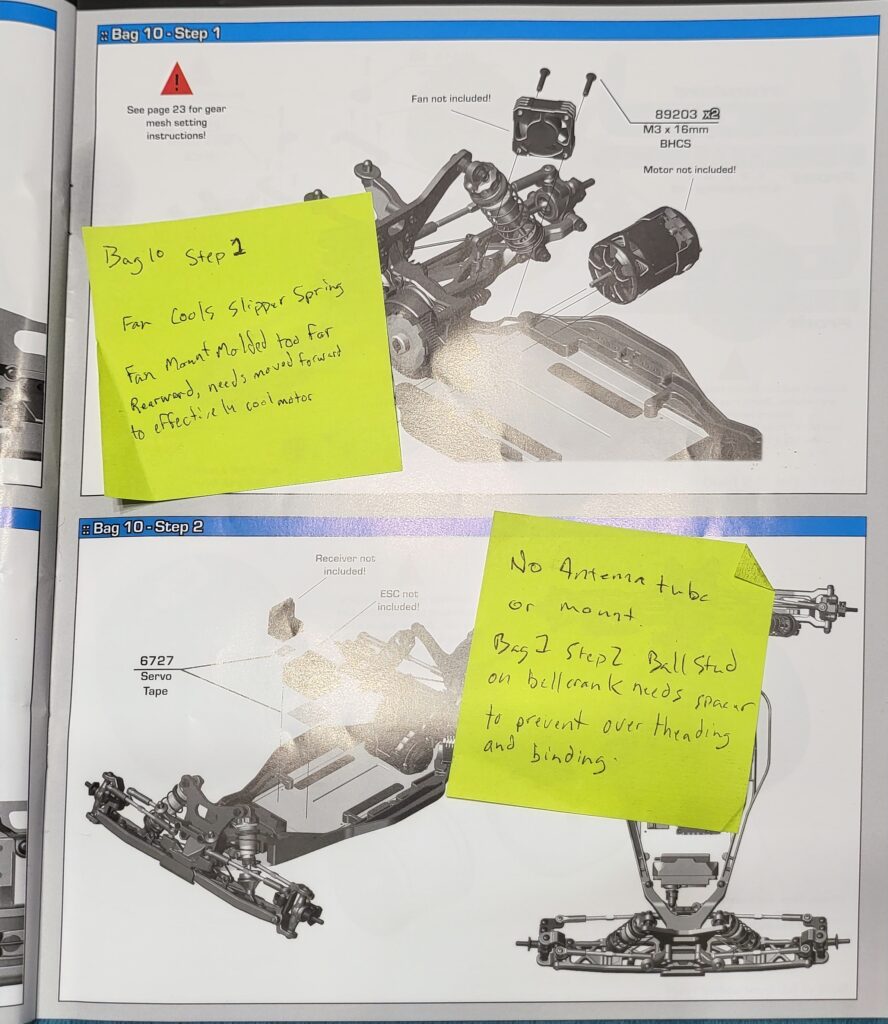
In bag 10, step one, the motor and fan are installed but the location of the fan cools the slipper assembly instead of the motor itself. If Associated moved this mount forward by 20mm or so it would direct air to the motor more efficiently rather than at the slipper plates and transmission housing first before finally reaching the motor.
Following in step two, note that there is no antenna mount nor antenna tube included in this kit. While some racing receivers do not use an external antenna the Radiolink R4FGm that I used in both of these trucks use a short, roughly five inch long, antenna that needed a home to keep it safe. I chose to use an RC-One blue aluminum antenna mount that secures using an M3 flat head screw that is countersunk from beneath the battery mount plate. This is a simple and effective way of adding an antenna mount to your T7 and SC7 that is also inexpensive at less than $10 each.
The builds went smoothly and only required a little thought to trudge through the few steps mentioned above. I was oddly missing the 25t servo horn from both parts trees in both kits and instead purchased a pair of non-clamping 15.5mm black anodized horns from the Factory Team division of Team Associated. While these fit perfectly and look great they did set me back $40 for the pair! I wasn’t expecting that one, but given that the Associated horn is such a unique shape, not just any horn will work. The instructions mention that only low-profile servos will fit, and while it is a tight squeeze on the T7, both it and the SC7 can technically use a full-size servo. I used Injora half-height servos in both trucks and had room to spare in both.
Overall, I would recommend either one of these kits to anyone looking to get into SC or ST racing as both are extremely fun and these kits will give you every advantage that the latest generation of chassis has to offer. If you can’t get these trucks working on the surface at your track it’s you, not the truck!
Stay tuned for a full review of each truck, coming soon!