
First of all, a huge thank you to RPM for sending these over, without them this wouldn’t have been possible.
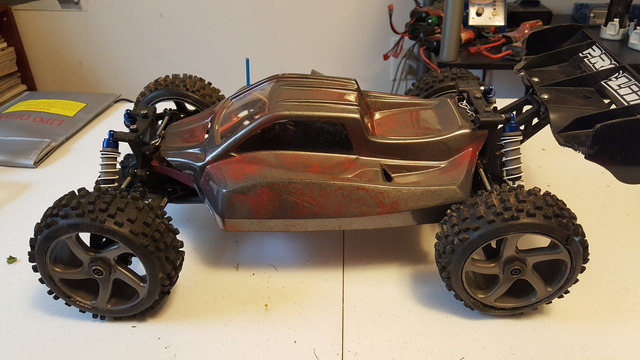
Up for review today is the new RPM “No Clip” Body Mount System for the Traxxas Slash 4×4. This system is listed as item #70920 and has a MSRP of $27.95. The body mounts are also available for the Slash 2wd as item #70860. I will be installing them on a Slash 4×4 HCG that was assembled from spare Stampede 4×4 parts. This truck was being used as a backslash 4×4 with a 1/8 buggy body, wing, and tires. I have since removed the buggy parts and returned it to a stock(ish) Slash 4×4.
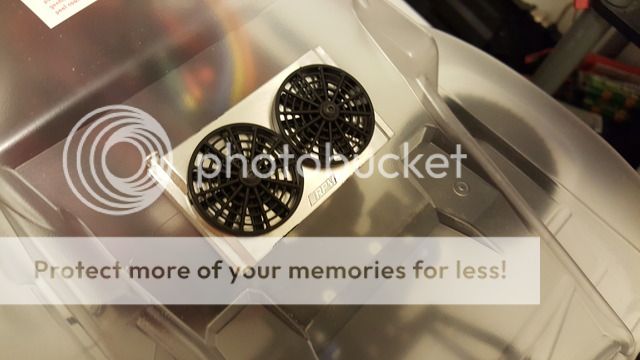
OUT OF THE PACKAGE: The parts have a very nice finish and look very nice. The ejector pins are there for a reason too, so keep that in mind before thinking that that was an oversight or mistake. The instructions are very clear and in this case are composed of two sheets. The first sheet is the assembly instructions while the second sheet is the template that shows where to cut the body for the mount screws.

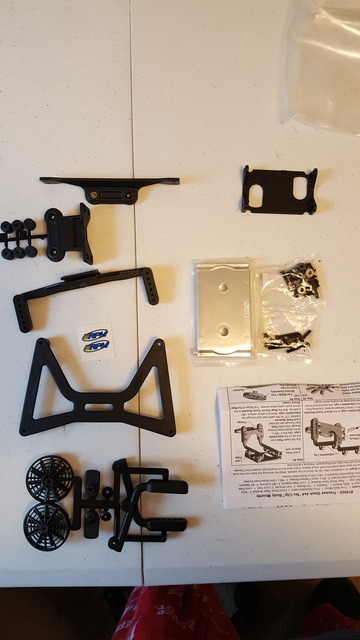
ASSEMBLY: The instructions are clear, albeit quite packed with information, but legible and concise nonetheless. The front side is 90% text with just two pictures while the back side is approximately 50/50 and is easier to follow along with. I supplemented the written instruction by following along with the instructional videos that RPM provides on their website (https://www.youtube.com/watch?v=x-If…ature=youtu.be and https://www.youtube.com/watch?v=Nt9i…ature=youtu.be) and this was a big help in getting parts oriented in the correct way. The assembly went quickly, only taking about 20 minutes from start to finish, and i didn’t encounter any problems.
FIT AND FINISH: The parts assembled into a surprisingly robust assembly compared to the stock mount. The parts do have a little flex to them but it is nothing that is going to cause the body to flop around like a fish out of water when the truck is running though. All of the 3mm nuts fit snugly into their captured areas of the parts, the screw heads fit my drivers tightly and all of the holes hold the screws very securely. All in all i am very impressed with how the assembly feels.
DURABILITY: I have to confess something here. Out of all of the SC trucks that I have at my disposal, I do not have a single stock Traxxas Slash body. I have plenty of Pro-Line shells, some JConcepts and even a Protoform, but no Traxxas bodies to use for this test. I am in the process of getting one in and painted and as soon as I do I will update this review with my findings. On a side note I did drop the truck off of my bench by accident and it landed upside down directly on the mounts and they are still in the same position that they were when I first put them together. The parts flexed enough to absorb the impact and popped back into place without warping or staying bent. So far, so good.
OVERALL THOUGHTS: I am impressed with the RPM “No Clip” Body Mounts. RPM is on to something with these as they fill a need in two different markets: those looking for a more scale appearance and those who never want to lose a body clip or break a body mount again. When I first saw the way the mount was designed I was afraid that the body could be put into a tweaked position if the mount did not assemble correctly or if it took a hard hit and this could affect performance, effectively turning the body into a big spring (think torsion bars on a 1:1 truck). This is not the case though, as the mounts assemble 100% true and seem to hold their shape quite well when a force is applied to them. I have no doubt that these will be a big improvement over the stock mounts and even over other aftermarket body mounts. As soon as I can get a body in and painted I will be doing some more testing (read: abusing) with these mounts.
Links: “No Clip” Body Mounts for the Traxxas Slash 4×4 | RPM R/C Products
I got the body in last night (Traxxas part #6811) and got it drilled for
the new mounts. I took my time here, around an hour, to make sure that
everything was lined up 100% correctly as it would be a shame to have
new body mounts that are designed to reduce the number of visible holes
in a shell only to foul it up and have 35 random holes because i drilled
them in the wrong spot. The instructions are very clear and the
templates fit the body very well with trim lines for number plate bodies
as well as plate-less shells. The body has two small dimples, one in
the front and one in the rear, and the center arrow on the template
needs to line up as close to those dimples as possible. Once lined up
the holes are in the exact spot and the mounts fit well. The first time
mounting the body to the chassis takes a little patience but it lines up
well and the more you do it the easier it becomes. The front of the
body slides into the front lock plate and then the rear goes down onto
its mount. Doing this while the body is clear makes this process much
easier. I am going to paint the body as soon as the weather warms up to
freezing (it was 6 degrees today) and I will do some testing on the
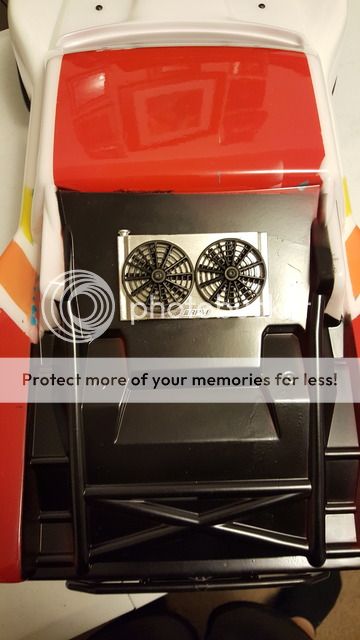
mounts then. So far the mounts hold the body very snugly and don’t
rattle at all. The radiator looks a little small against the large open
space of the bed area but hopefully will look more realistic once the
shell is painted. Here are some pics of the shell mocked up with the new
mounts:


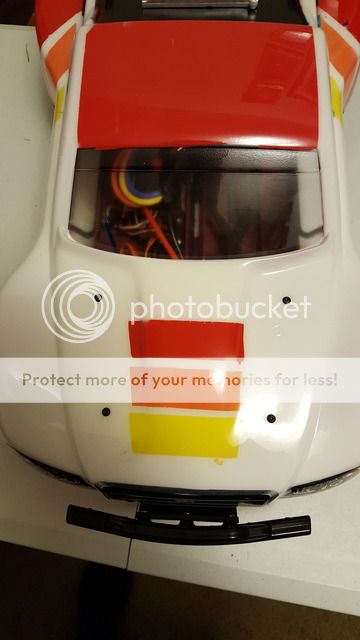
I got the shell painted today, and while it doesn’t have any decals yet,
it is ready to get destroyed! The body is slightly more difficult to
line up and lock down than when it was clear but it is nothing that is
unmanageable. The front mount is very easy to locate but I found it
easier to set the truck on its side while lining up the rear. My best
piece of advice when setting up the fans is to snug the screws down
until the fans are difficult to move and then loosen them in one hour
increments until they operate smoothly without being too loose or tight.
I picked the truck up by the body and the mounts stayed where they are
supposed to be without moving. The rear lock plate flexes quite a bit so
if you are having trouble lining up the mounts, try reaching in through
the passenger side and holding the lock plate from the bottom while
pushing down on the body from the top. This will help hold things in
place while aligning everything and won’t allow the lock plate to flex
out of the way. So far I am extremely impressed with how the mount holds
the body and how the parts fit together. I will be doing some testing
as soon as the weather warms a little so that I don’t shatter the shell.
I am hoping to take the truck to the local skate park to try out the
mounts (as well as the new RPM front and rear bumpers) in the most harsh
environment that I can. Here’s how it looks now that the shell is
painted:
TESTING: I finally got some testing done with these new mounts and I have to say that I am impressed. I ran three packs through the truck (a total of about 90 minutes worth of run time) and had zero failures. I package taped the body before running to keep it looking somewhat nice and other than the tape getting ripped up, the truck looked the same when I was done as when I started.
The body doesn’t rattle when jumping or when going over rough surfaces (such as tree roots or whoop sections) and the body stayed in the same position throughout the run. I didn’t have to shift it side to side to combat tire rub or push it front to back to get it off the bumpers. The mounts do flex on impact but come back into shape without any assistance. I intentionally landed the truck upside down a few times to see how the mounts hold up and they didn’t seem affected. The worst part was knowing that this was a brand new body that I was intentionally doing this to!
The mounts seem to support the front of the shell better than the stock mounts as the entirety of the hood is braced instead of just a strip across it and this helps the body keep its shape on impact and keeps the fenders from cracking. I didn’t notice any weird handling traits due to the extra weight up high, even on asphalt. The mounts even kept the body stationary when running the truck into solid objects, like re-bar and tree trunks. These center on impacts placed the most force on the mounts in one vector and the body didn’t shift or pop out of the mounts. I even did this test in reverse to see if the front “catch” would release with enough force and it stayed in place. I’m sure that the RPM bumpers had a bit to do with absorbing the impact but the body did stay in place.
PRO’S:
-No body clips that can be lost during a run
-Much more durable than a stock body mount
-Better support for the front of the shell during impacts, making the shell last longer
-Limited lifetime warranty
-Allows adjustment of the body height
-Scale looks
CON’S:
-Takes some practice to get the body secured without fiddling
-No pitch adjustment in the rear lock plate to accommodate other shapes of bodies
FINAL THOUGHTS: The RPM “No Clip” body mount system works, and it works well. If you have a stock Traxxas body and want more scale looks then these body mounts are for you. If you are sick of losing body clips, these mounts are for you. If you beat your truck mercilessly every time you take it out, these mounts are for you. While RPM doesn’t guarantee compatibility with any other bodies, I’m sure that others have a similar enough shape to make the mounts work, so don’t let that deter you from trying these with your favorite shell. I beat on my truck much harder during these tests than I ever had before and the mounts held up to everything I threw at them. I am still getting used to securing the shell, but the more I do it the easier it is getting. I would recommend these mounts to anyone with a Slash 2wd or 4×4 as it offers so many benefits with so few negatives (and I am really nit-picking here) at a very reasonable price. If you’re anything like me, these mounts will pay for themselves in the first 6 months just in lost body clips!
TIPS:
I spoke to RPM earlier and they passed along some tips to make securing the shell easier. “Take a look at our mini video (link here https://www.youtube.com/watch?v=k87oADCzpac) Notice my hand placement at the 0:26 mark. Grab the body here on both sides, pull down and push the body forward to engage the front catch. From there, push the radiator forward until it slips into the lock plate in the rear. Then it’s a simple matter of turning the fan shrouds to lock it in place. If you push down in the rear, that’s when you get flex in the rear mount that hinders the lock feet from engaging the lock plate.”
I followed these instructions and got the body on quicker than using four traditional body clips. One more thing that impresses me is how quiet these mounts are since they hold the shell tighter to the mounts than traditional body mounts do.
Mini update: I wanted to let everyone know that I did all of my testing
with the body buttons installed. These will keep the screws from pulling
through the body after repeated impacts. I left them off for the photos
to give a better idea of what the truck looks like sitting on the shelf
without the buttons installed. On a darker paint scheme the buttons
will not show up nearly as much as on the white of my truck. They do
increase the surface area of the mounting point quite a bit and should
eliminate any tearing at the screw holes. Here they are installed:

I was noticing that it was sometimes difficult to tell where the fan
shrouds were in relation to the lock plate and that made it difficult to
release the radiator from the lock plate. I used a silver sharpie to
mark the bottom of the shrouds when they were in the unlocked position
and this makes it much easier to know when the body mount is locked or
unlocked at a glance. The marks don’t stand out enough to detract from
the overall look but they do make it easier to use the mounts.
