
Building upon what I learned from my previous sprint car (1/6 Handbuilt Sprint Car – RCCrawler
) I wanted to build something a little more performance oriented and
something that anyone can replicate. This time around I didn’t want to
use a hand-cut chassis or one-off roll cage but rather an off the shelf
2wd LCG chassis and McAllister Mercer body and wing.
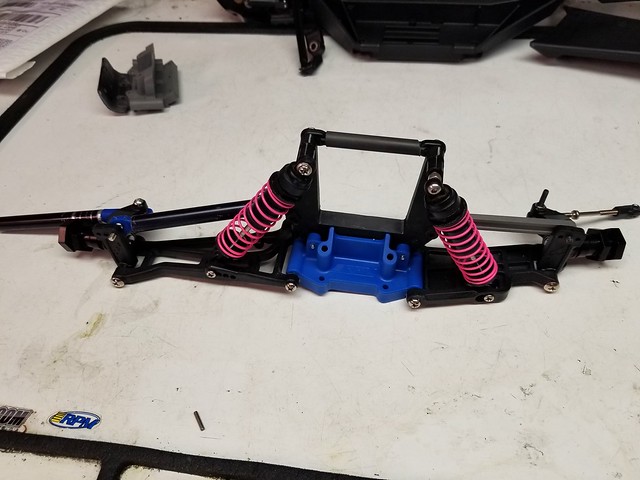
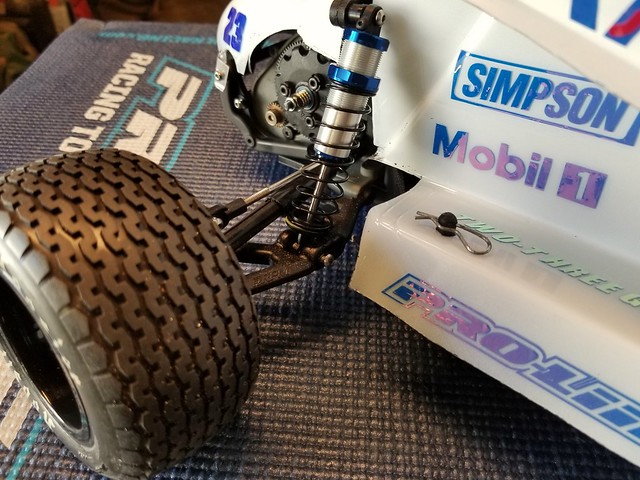
I wanted to use a more radical offset suspension on this car versus the
V1. It had Bandit suspension arms on the left side (in the correct
orientation, front on front, rear on rear) and Rustler rear arms on the
right (rears on front and rear, Jang-wide-mod style). For the new car I
wanted even more weight on the left side of the car which meant widening
the right side even more. I started with a mock-up set of Jato arms
that I had lying around and went from there. Using Jato arms requires a
fair bit of filing and fitting but in the end it is a fairly simple
conversion. I also threw in an RPM blue front bulkhead to give me a
place to add some weight to the nose if need be. Once the links were
made to the correct length I swapped out the stock “mock-up” arms for a
set of RPM arms in black for a little extra durability. For shocks I
threw on a pair of stock Ultra shocks, a Bandit rear on the right front,
a Bandit front on the left front and no-name rear shocks on the rear
with limiters to set the ride height. This setup left me with a ride
height of arms level everywhere except the right front. I had to install
a 3mm spacer under the piston to lower that corner to the correct
height. I also swapped out the front axles for a set of Slash front
axles (more on this in a second).
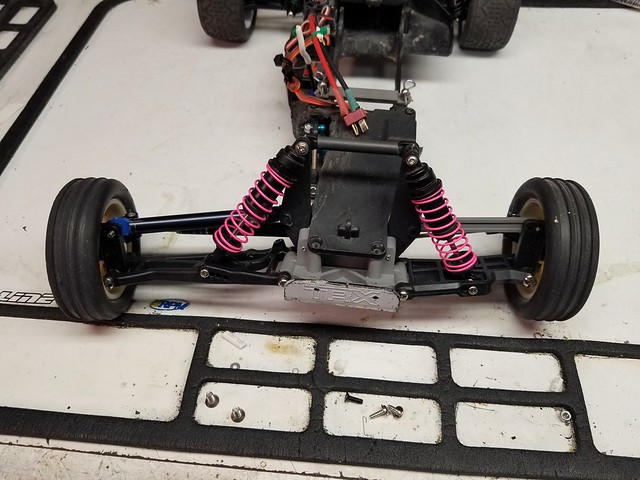

Here’s a shot of the Slash axles on the car with the Bandit axles on the
bench. The Bandit axles are too short to be used with 12mm hexes.
At this point I have to admit, I didn’t start with a 2wd Slash. I parted
out my Bandit for its front and rear end and swapped out the chassis
for a black Slash LCG chassis and black lower deck. I already had
everything else that was in the LCG kit so this was a cheaper way to go.
Mounting the body requires (2) 1″ body posts to be mounted in the rear
of the chassis tub where the rear screw of the nerf bar goes. I used a
set of Slash 4×4 body mounts that I had lying around as they were the
correct length and easy to come by (part #6815R).
The body comes in separate pieces; the main body, tail section and front
wing (front wing is optional) come as one package, the 7×7 top wing as a
separate kit and the driver figure as a final garnish. I am using the
body and top wing kits but didn’t go with the driver figure. I will have
a separate article available soon giving my thoughts on the Mercer body
and its assembly. I also had a local company Two Three Graphics Co.
make a set of graphics for the body to spice up the simple one-color
paint job. The graphics are cut from holographic purple outdoor vinyl to
pay homage to my Margay Puma dirt kart that I raced back in the late
90’s (purple and white were my thing back then).


The 7×7 top wing, fully assembled and ready to mount.
Head-on view of the front wing

Side view of the front wing
First mock-up of the body on the chassis
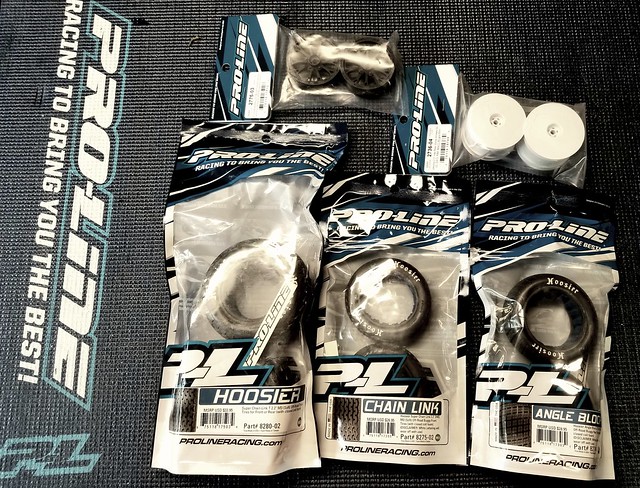
With the body and chassis work done, it was time to pick out the wheels
and tires. I am going to be honest here, Pro-Line’s recent release of
the Hoosier dirt oval tires for stadium trucks and buggies was a big
motivator for me to build this car.
The Mercer body is designed to work with 2.2″ stadium truck rear tires
and either 2.2″ buggy rear tires up front or 2.2″ buggy fronts, although
the buggy fronts are a little small for the scale of the car. I picked
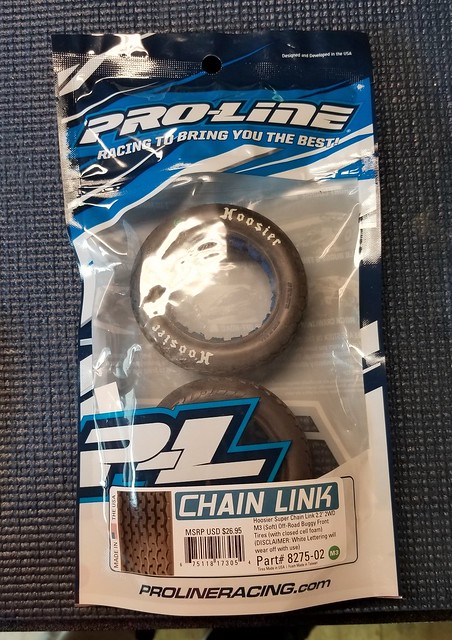
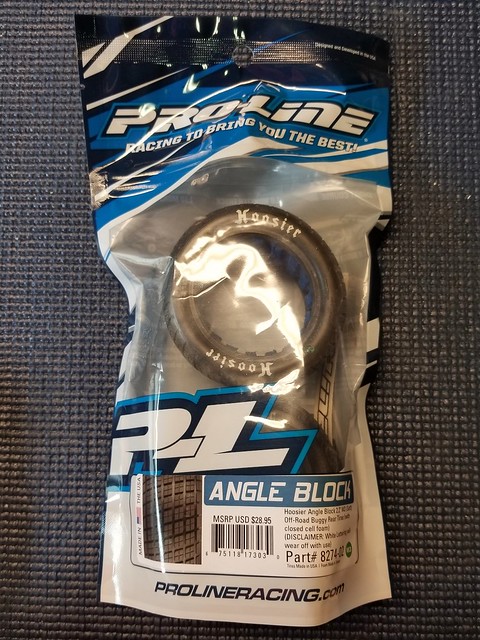
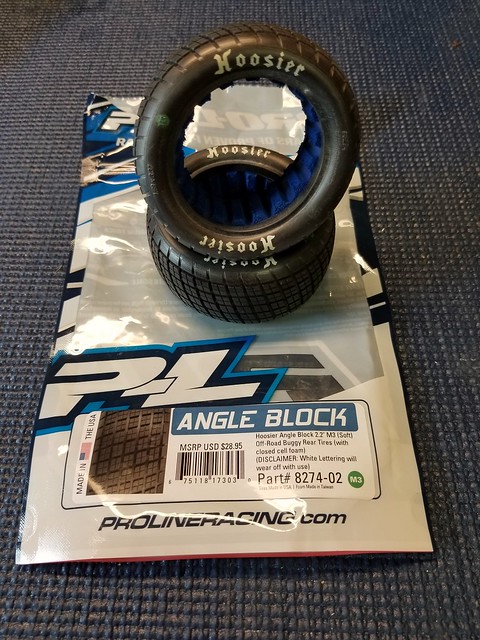
up 2 sets of Pro-Line Super Chain Link T’s in the M3 compound
(#8280-02), one pair of Chain Link 2.2″ buggy front tires in M3
(8275-02), and one pair of Angle Block 2.2″ buggy rears in M3
(#8274-02). I got two sets of the Super Chain Link T’s to experiment
with foam tuning and stagger for the right rear tire at a point later in
the future. For wheels I chose RPM’s Revolver 2.2’s in black for the
front of a Rustler or Stampede (82062) to use in the rear and a set of
Revolver Crawler wheels (82232) to use with the buggy rear tires on the
front. The buggy rears fit quite nicely on the narrow crawler wheels and
glue up like a charm. For the Chain Link buggy fronts I used Pro-Line’s
new Pomona 2.2″ front wheel.

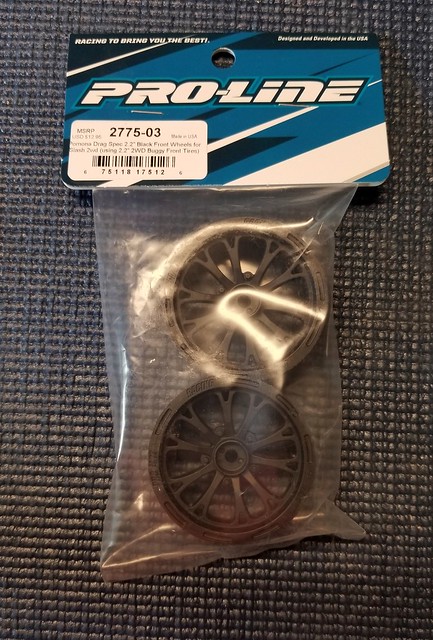
The Pomona 2.2″ front wheels


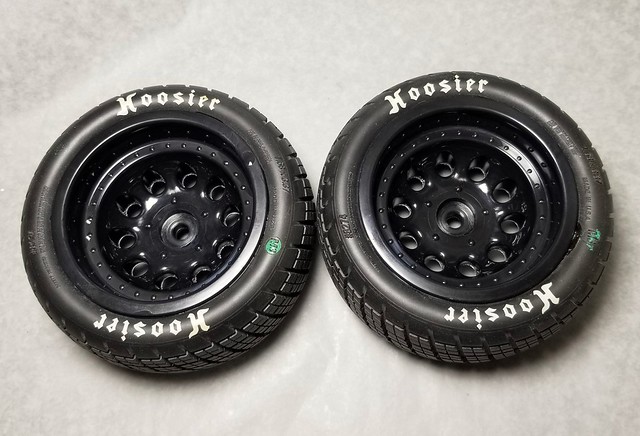
The Angle Block’s on Revolver Crawler 2.2’s
This is the car with the Chain Link T’s on the rear and the Angle Blocks on the front

And this is the car with the Chain Link 2.2″ buggy fronts

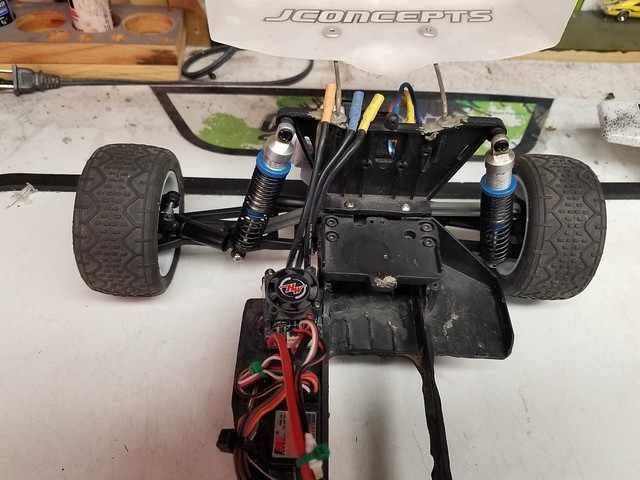
At this point the car was ready to do some shakedown runs but with the
questionable nature of the shocks that were on the car I knew it
wouldn’t be up to par. The Ultra shocks were holding up fairly well but
the rears were no-name aluminum bodied shocks that I had gotten for a
review and were filled with 7,000wt diff oil just to have some damping
(the pistons don’t have holes but rather slots and large ones at that)
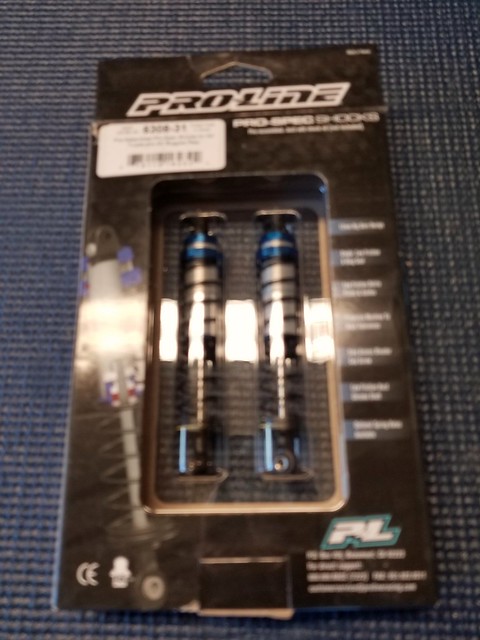
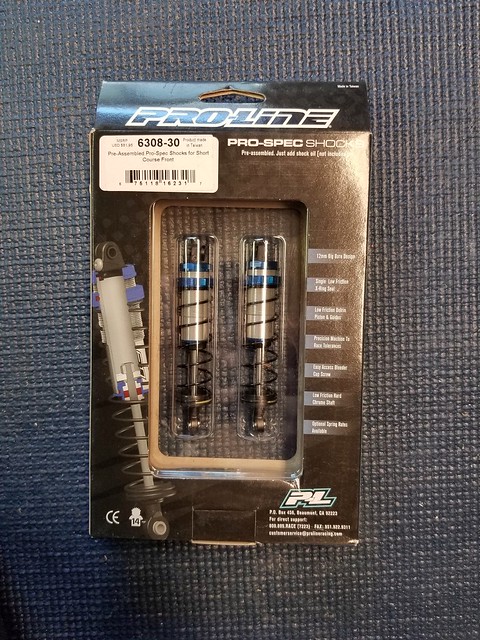
and were leaking. Pro-Line to the rescue! We looked at the lengths that
were available and settled on Pro-Spec Short Course rear’s for the right
side and Pro-Spec Short Course fronts for the left side. Out of the box
these were the perfect length to set the car at arms level on all four
corners. These shocks are by far the smoothest I’ve ever used (these are
even slightly smoother than the Pro-Fusion SC’s shocks, which are
excellent themselves). I also picked up the tuning spring sets to allow
some fine tuning of the handling.


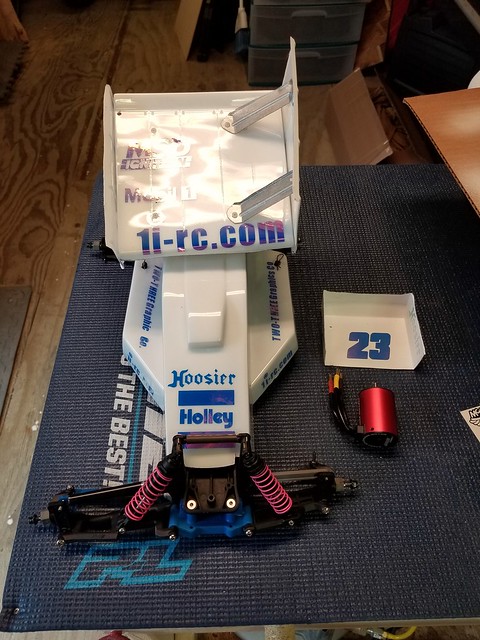
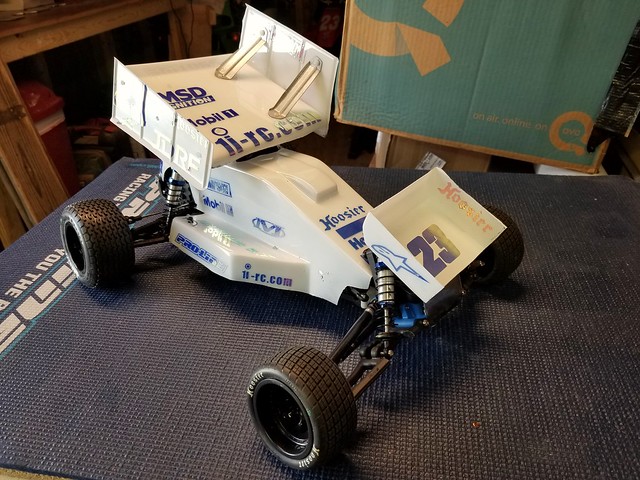
Finally, this is how the car sits currently


A huge thanks goes out to the folks at Pro-Line and McAllister racing who helped make this project possible.
UPDATE:
My neighbor Jim saw me out in the driveway testing the car (setting steering trims and making a few changes to the ESC programming) and came over to see what was going on. He was telling me that is is preparing to open an antique/oddity/thrift type store and had just installed new carpeting that he thought would be perfect for “playing with my toy”. I immediately took him up on his offer since there are no real carpet tracks anywhere nearby any more and I wanted to see how the Hoosiers hooked up on ozite. The storefront was around 800 sq. ft. and didn’t have any of the store fixtures in it yet so it was the perfect place to have some fun. We laid out a track using some shoe boxes as corner markers and had a blast clicking off laps. He had never driven a hobby grade RC before so even doing easy laps with the car was like driving an F1 car for him. After a few laps he had gotten the hang of it and was able to drive several laps at a time without weaving or hitting a box. This was a lot of fun for me just to watch him having fun.
Once we finished up a pack swapping the transmitter back and forth I plugged in a fresh 2s and hit the “track” for some laps at speed. The car has a ton of forward traction, carrying the left front from corner exit to corner entry as long as the throttle was held steady. The car steers like there’s no tomorrow. At no point did I need to chop the throttle to get the nose to take a set or have to lock the brakes to slide the rear. The first few laps were quick. I mean really quick. So quick that I didn’t notice the clicking every time I pulled the throttle coming off of the corner. I did notice when all forward motion stopped and it sounded like the transmission was filled with gravel. I will be replacing the transmission with something a little more “racy” that will improve durability and reduce rotating mass. I will update as soon as the new transmission is in.
UPDATE!
I got the new transmission in on Saturday and it is even nicer than I imagined. Here’s a shot of the new Pro-Line Performance HD Transmission:

Item#
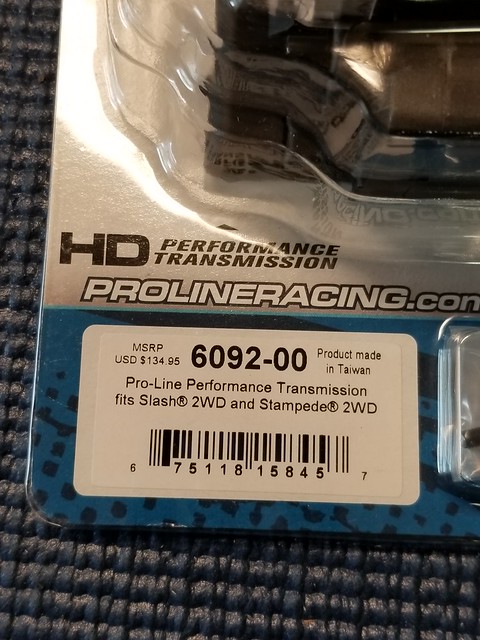
Out of the blister:
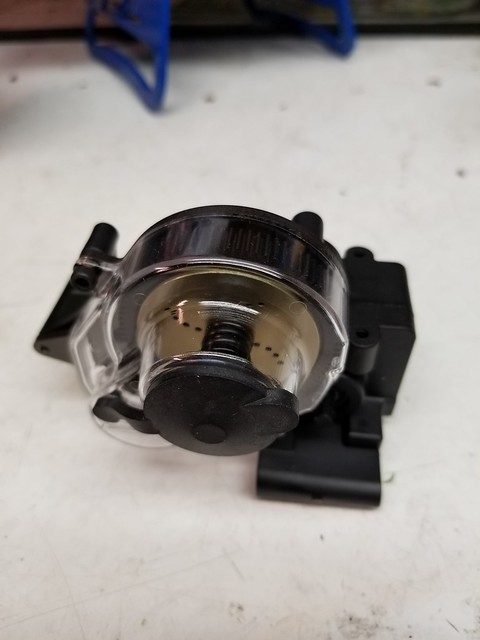

In the car:


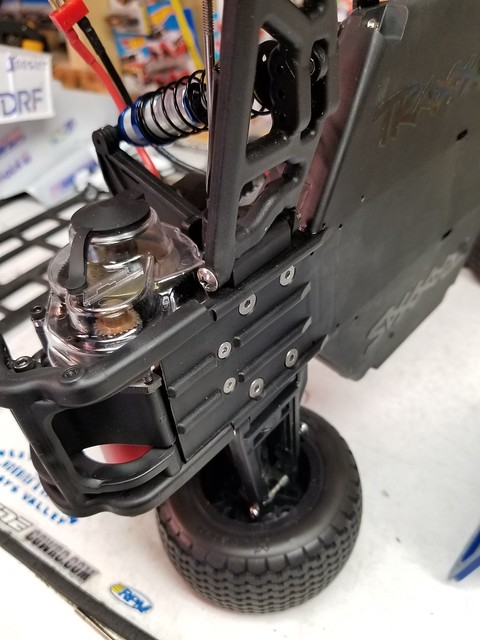
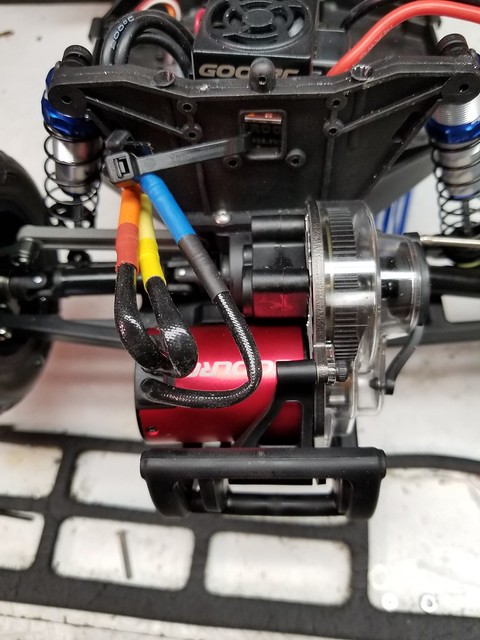
The transmission was easy in swap in and it spins so much more freely than stock. I will be trying it out with the included 5000wt diff fluid first but then will be switching to a much thicker fluid once the staggered tires are done and ready to go on the car. From putting around the driveway with the car it is noticeably different. It is quieter and the car feels snappier during short bursts of acceleration. We have plans to take the car back to the “track” this weekend, pending all goes well, and will report back once I get some laps on the car. __________________
2 thoughts on “Slash 2wd Sprint Car Conversion with Offset Suspension”
Comments are closed.